Provisioning a new device can be done in ways other than with Windows Autopilot. Let’s look at some scenarios implemented in Workspace ONE that leverage technologies that have been around since before Windows Autopilot even existed.
Provisioning packages
When using provisioning packages (PPKG files), you create a single file (.ppkg) that contains settings that should be applied to a device (offline MDM policies) as well as commands that should be run and content needed by those commands. You can then select that file during OOBE to automatically process those settings.
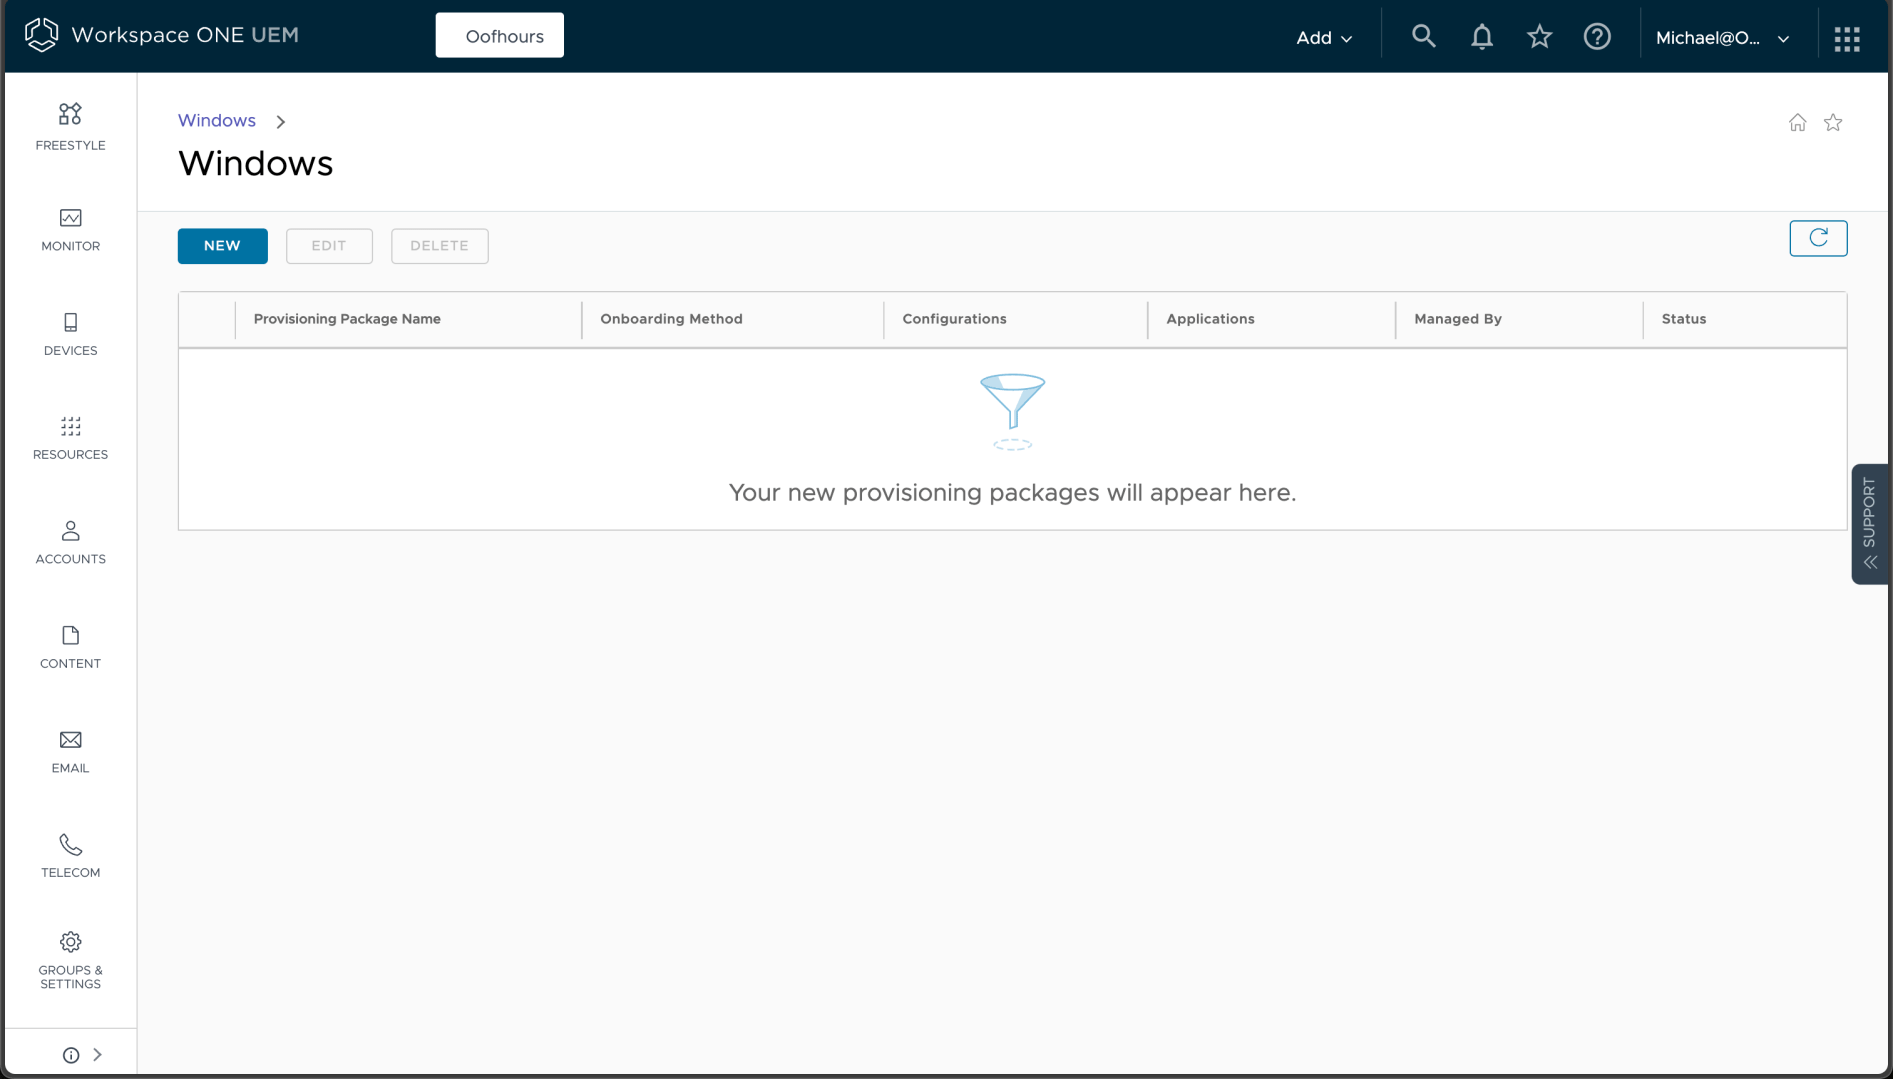
So how do we create one of those with the MDM enrollment specifics needed to get a device managed by Workspace ONE? Fortunately, there’s a mechanism built into the Workspace ONE web portal that will automate the process for you, so no need to use the (truly awful) Windows Configuration Designer. We can get to that on the portal from Devices -> Lifecycle -> Stages -> Windows:
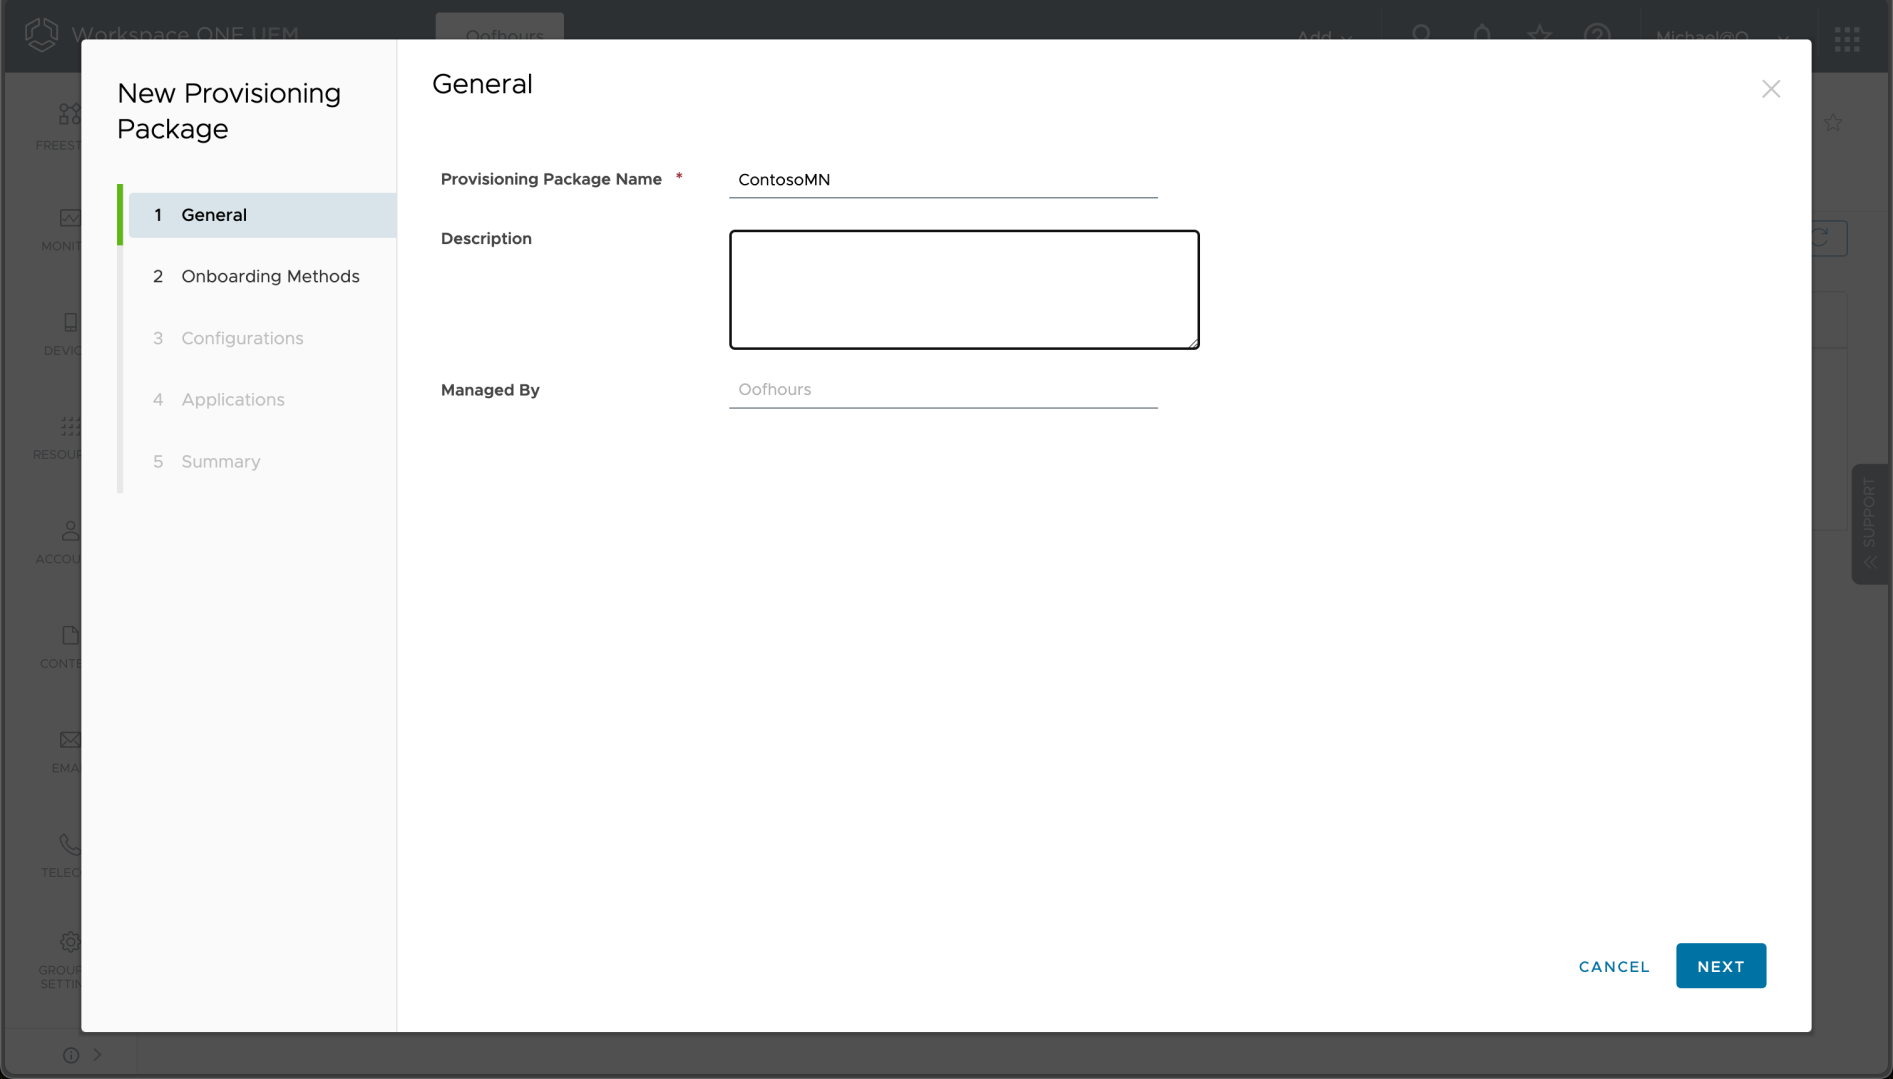
When I click “NEW” a wizard starts where I can give the provisioning package a name and description:
Next, there are two options:

We’ll use the “Encrypted package” scenario where the generated PPKG file is placed on a USB key that is inserted into the device when it first boots up. Since this provisioning package will be place on IT technician’s USB keys, encrypting and password protecting the files helps ensure that the information embedded in the package (e.g. your AD join account) don’t escape out into the world.
After choosing “Encrypted Package” option and specify a password to use, there are a bunch of options that can be configured. starting with the join type and OOBE configuration:
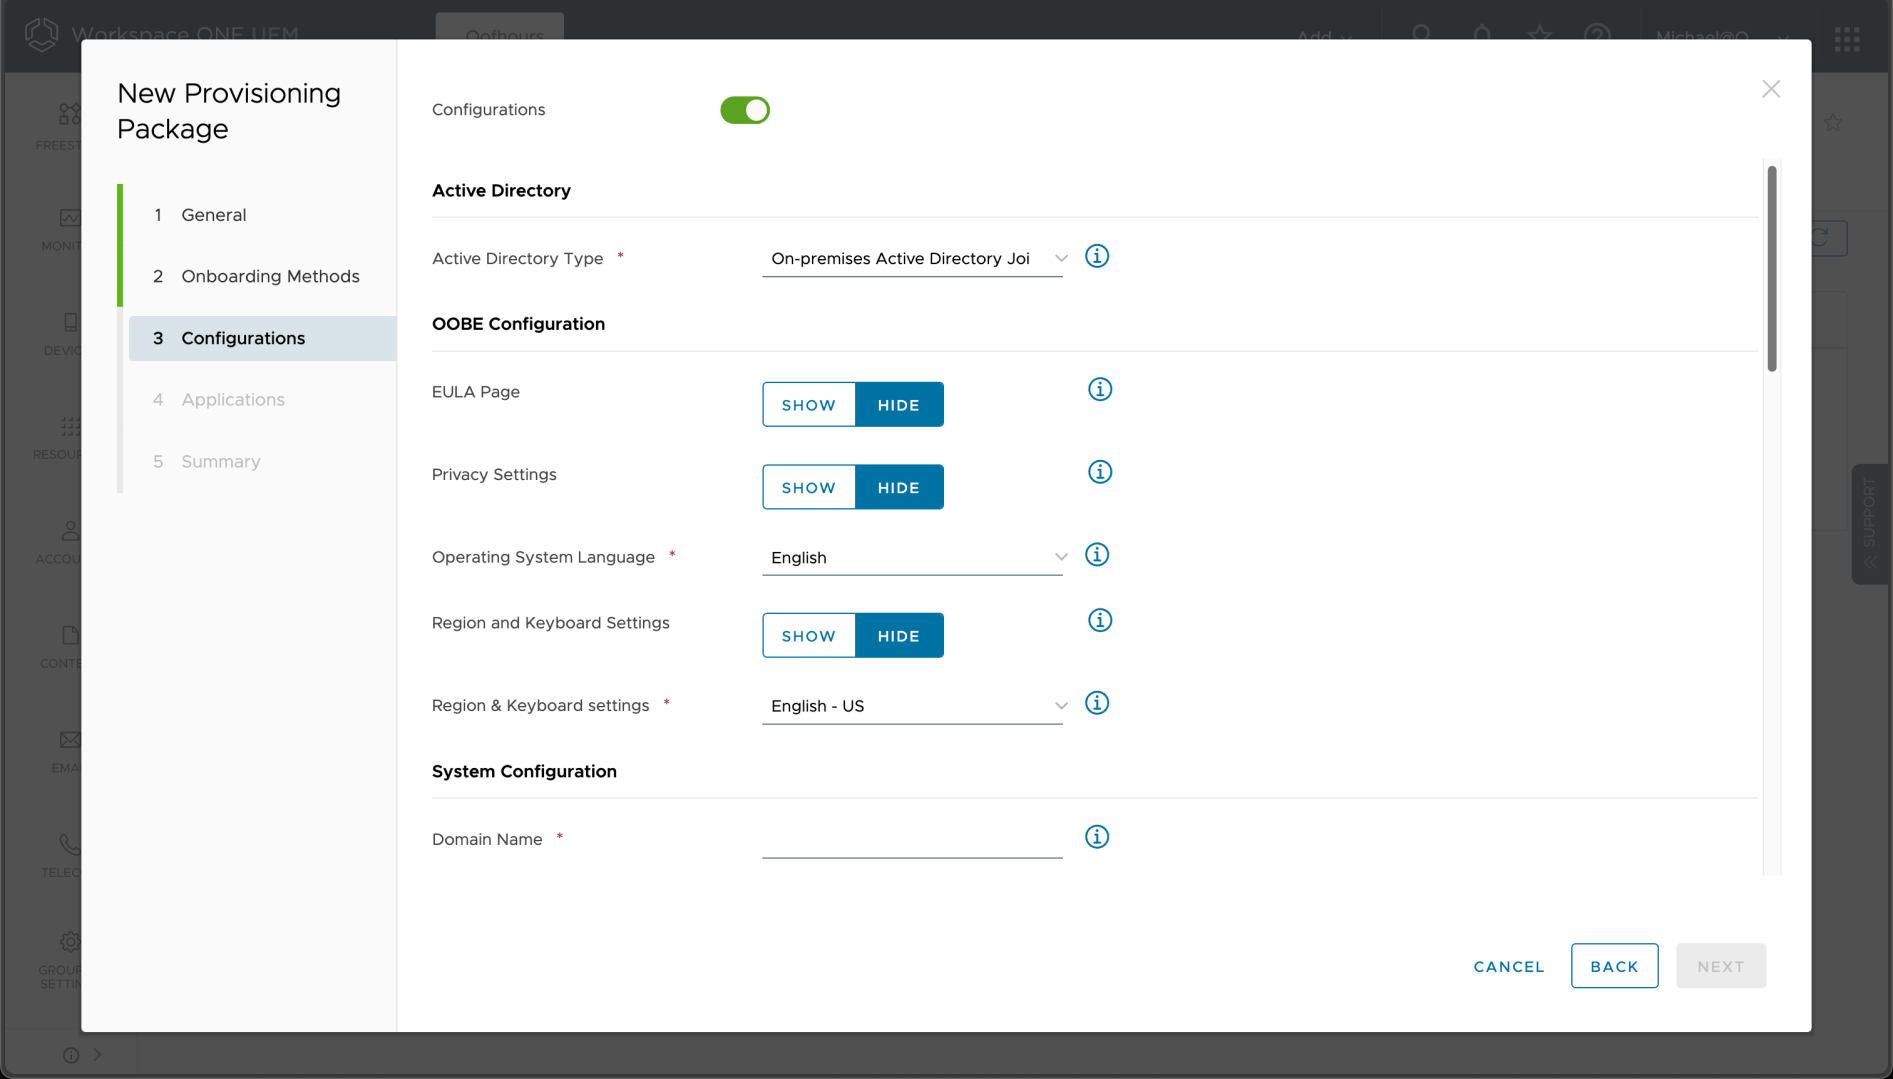
There are choices on the join type:

The first two make sense: you can join the device to AD (as long as it has line-of-sight to a domain controller) or you can put it into a workgroup. The last two require a little more explanation. With Azure AD Premium, automatic MDM enrollment is possible using the enrollment URLs that are configured in the Azure AD (Entra ID) service. Without Azure AD Premium, you have to explicitly specify the enrollment URLs. The end result is pretty much the same.
Then there are a bunch of configuration and enrollment settings that can be configured. Rather than include a set of screenshots, here’s a pasted-together composite:
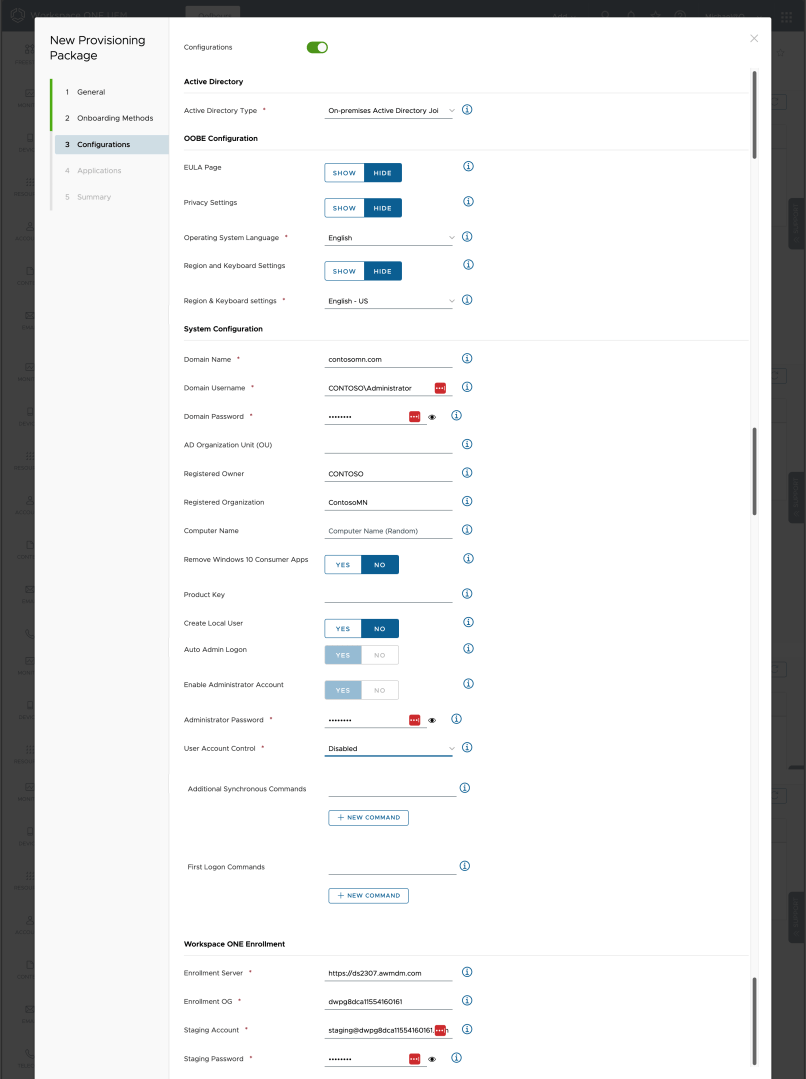
A few comments:
- The created PPKG will contain the AD join account and password, the local Administrator password, and the staging account and password (which exists only in Workspace ONE), hence why the generated PPKG is encrypted and password protected. But that’s not a password you’d want to give out to a lot of people, i.e. this is an IT technician type of scenario.
- The computer name will be generated using the first seven characters of the registered user, with random characters appended (standard Windows logic).
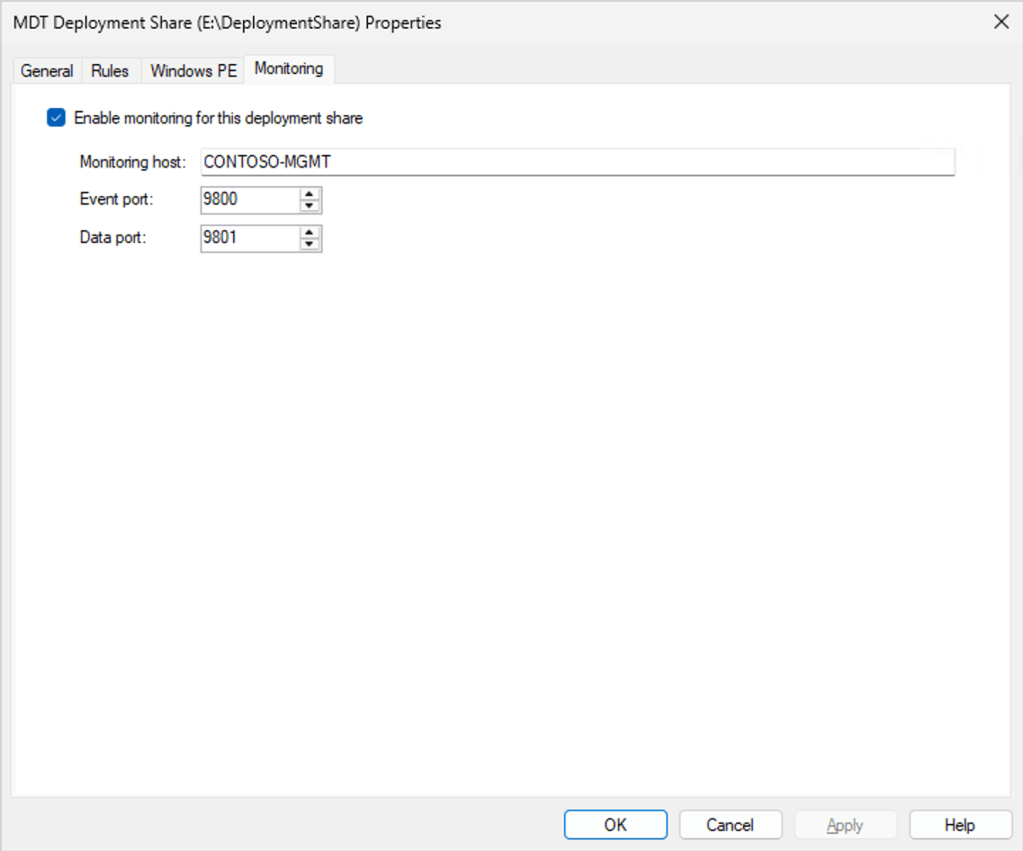
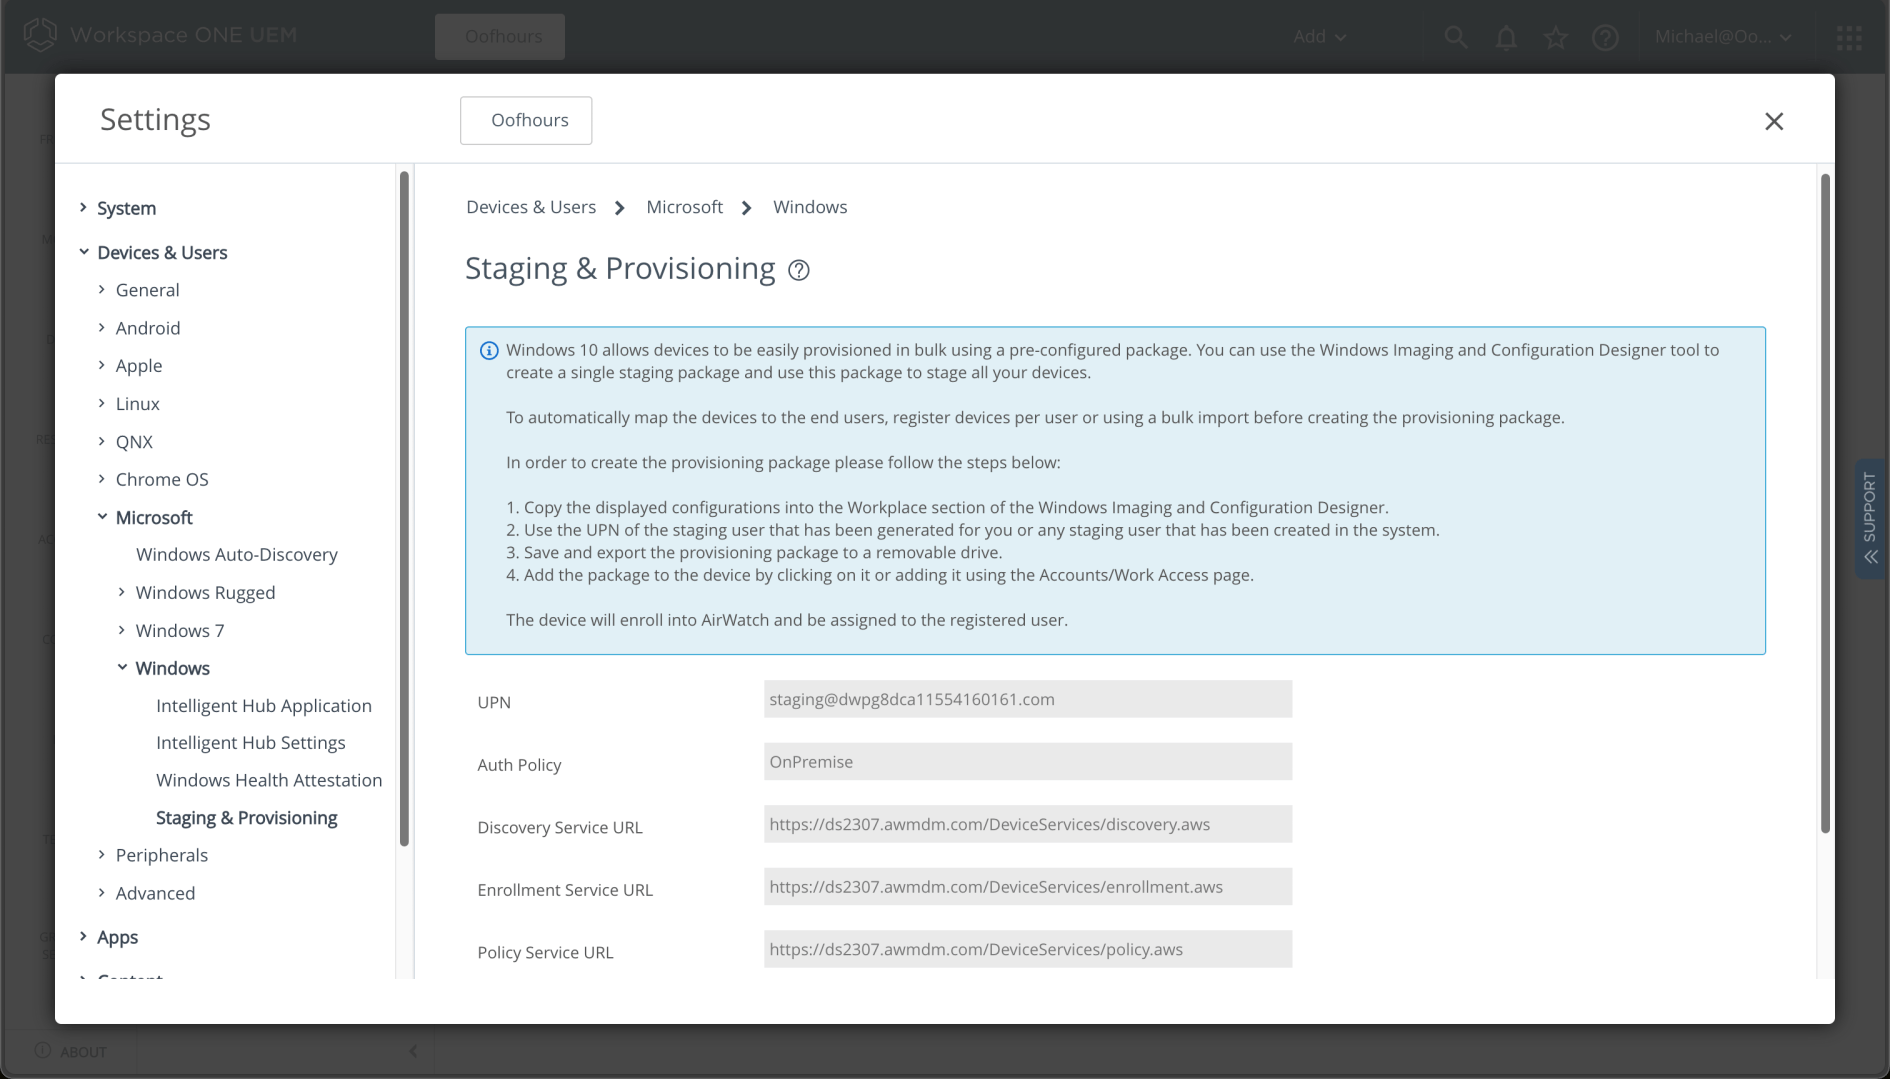
- The needed enrollment settings can be found in the Workspace ONE settings, under Devices & Users -> Microsoft -> Windows -> Staging & Provisioning. Separately, you can set the staging account’s password in Accounts -> Users.
Once you’ve filled in that long page of settings, you can choose the applications to include:

This will embed the content for the apps into the PPKG itself, hence there is no need to download the content from the internet, speeding up the provisioning process. That means that generating the PPKG can take a while, especially if you have a bunch of large packages. In my case, the apps aren’t that big, so this isn’t too bad. (The Microsoft 365 Apps package will just contain SETUP.EXE and the config files, not the entire set of M365 source files. You could create a custom package containing the full source if you wanted to.)
After a final confirmation, we can click “Save and Export” to start the generation process, which happens in the background, run entirely within the Workspace ONE service.

Initially, the status of the package will be “Requested”:

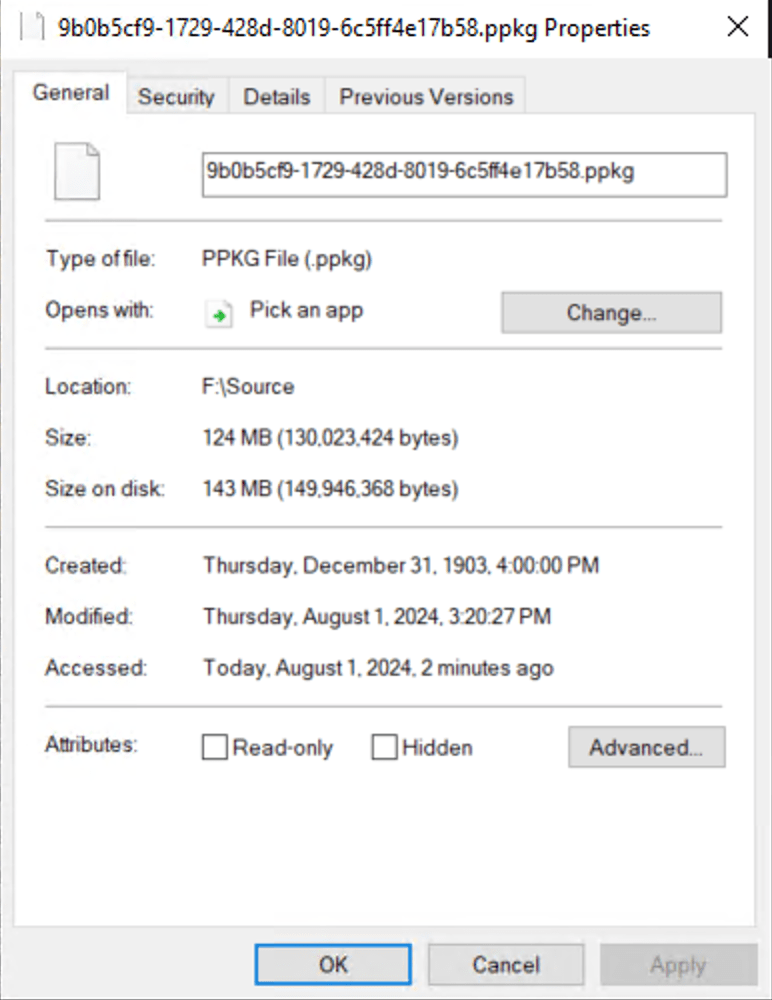
After a few minutes, “Requested” will change to “Download encrypted password.” (As a nice touch, you’ll receive an e-mail from the Workspace ONE service telling you when the package is done.) The resulting download in my case is a 500MB file, named using a GUID:
At this point, I could copy this PPKG file to a USB key, but since I’m testing in a VM, I need to do something different: I need to put that file into an ISO that I can mount in my Hyper-V VM. When I boot the VM to the start of OOBE with that ISO mounted, I can then press the Windows key five times from the logon screen (and other places):

Selecting the first option finds the only PPKG file available, so it automatically selects it and prompts for the password that I specified:

Everything in it is then processed:

Basic progress is displayed as the PPKG is being processed:

After the join, MDM enrollment, and app installation is complete, the device will automatically process the unattend.xml included in the PPKG file to automate the rest of OOBE, and then the device will be ready to go, ending up at a logon prompt where the user can sign in.
Workspace ONE Drop Ship Provisioning (Online)
Unlike the previous PPKG-based scenario where every device gets the same set of apps and settings, this scenario allows for device-specific customizations. That requires “online” interaction with the MDM service, and in many ways the flow is very similar to Windows Autopilot:
- Customers order devices from the OEM and specify that they should be registered with the customer’s tenant using a specific tag.
- Customers define policies and apps that are targeted to devices with that tag.
- The OEM manufactures the devices with an embedded Provisioning Agent included in the OS image.
- The OEM registers the device with the customer’s Workspace ONE tenant with the specified tag.
- When the device boots up for the first time (commonly done by the OEM themselves), the device is provisioning as configured by the IT administrator, based on the tag assigned to the device.
The Workspace ONE documentation explains this in greater detail. It’s worth noting that this only supports AD domain join and workgroup scenarios (not Azure AD/Entra ID join).
Fortunately to try this out you don’t have to buy a device from an OEM. Instead, you can self-register a device and use Windows audit mode to stage the needed files onto the device so that it automatically provisions itself when it first boots. So let’s walk through that process.
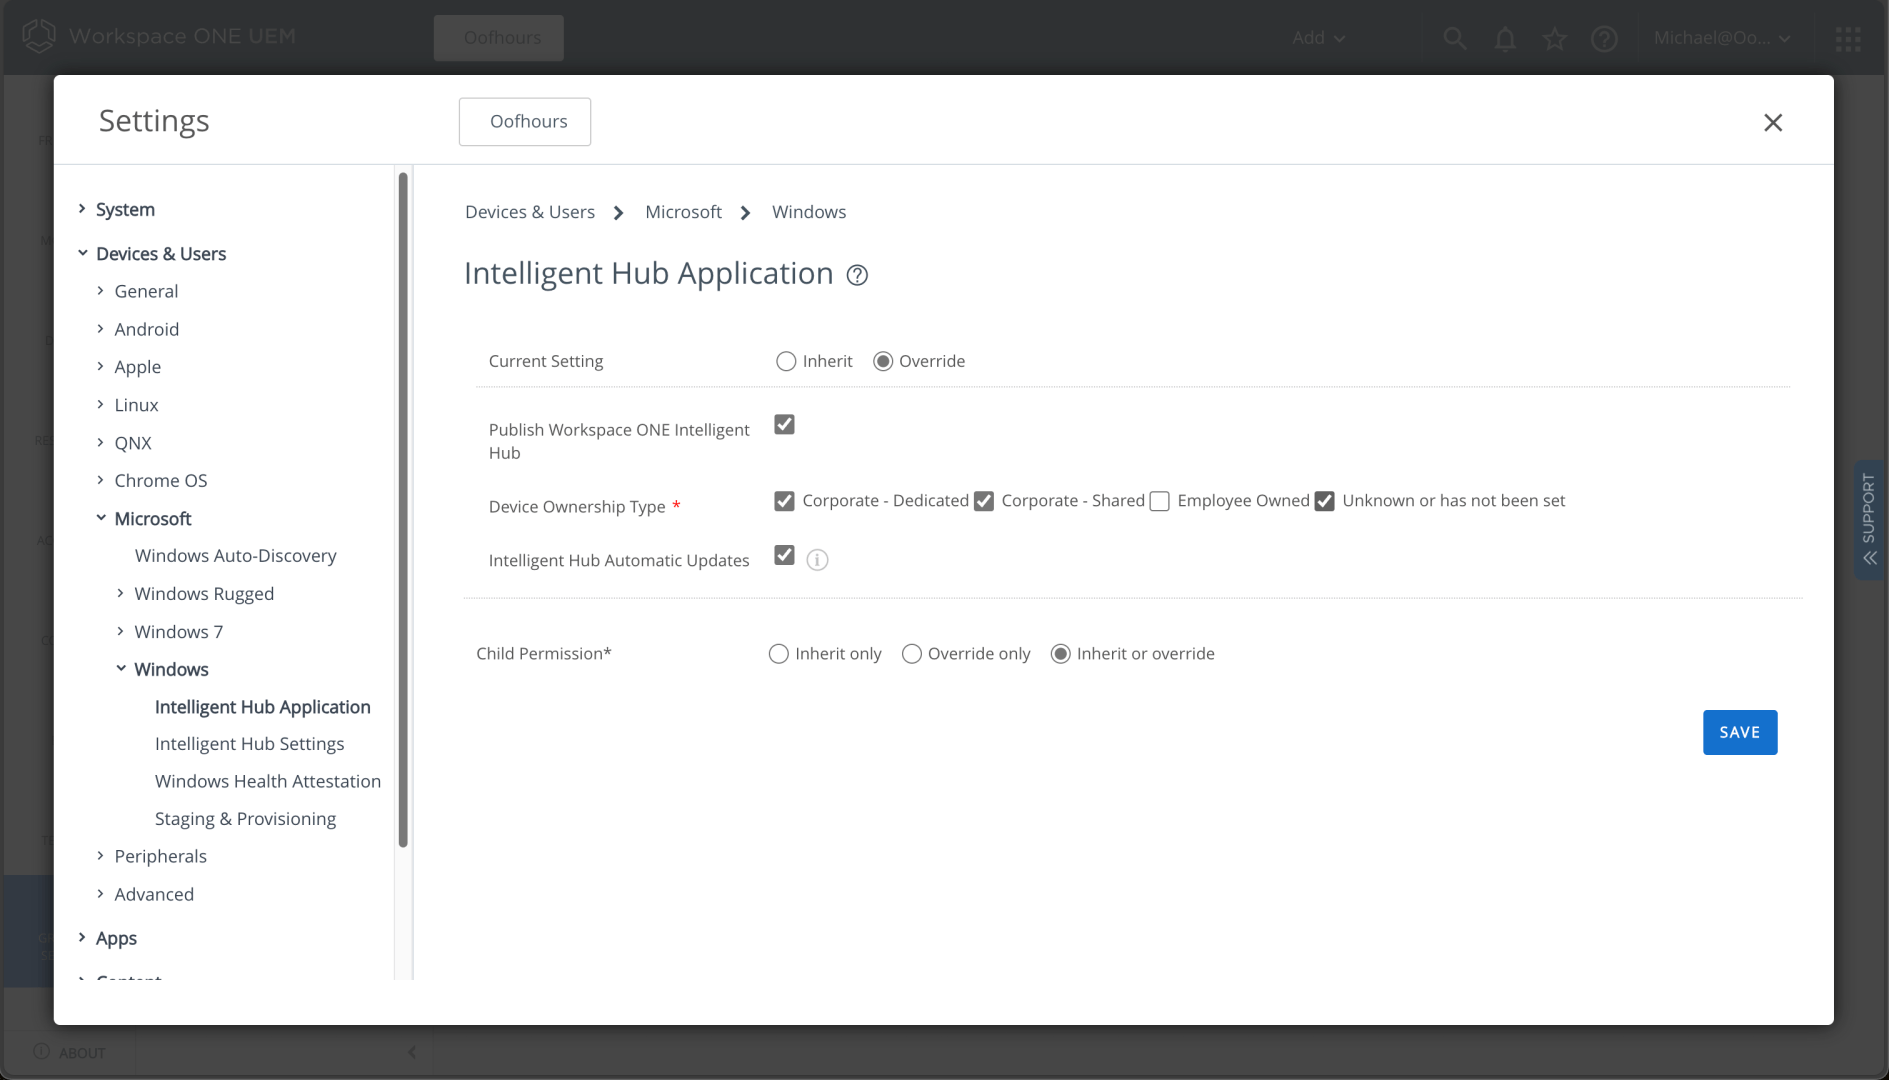
First, I need to make sure the Workspace ONE Intelligent Hub app is enabled for “unknown or has not been set” device ownership types (since these new devices won’t yet have this configured):
Next I need to enable “Drop Ship Provisioning” from Devices -> Lifecycle -> Drop Ship Provisioning.
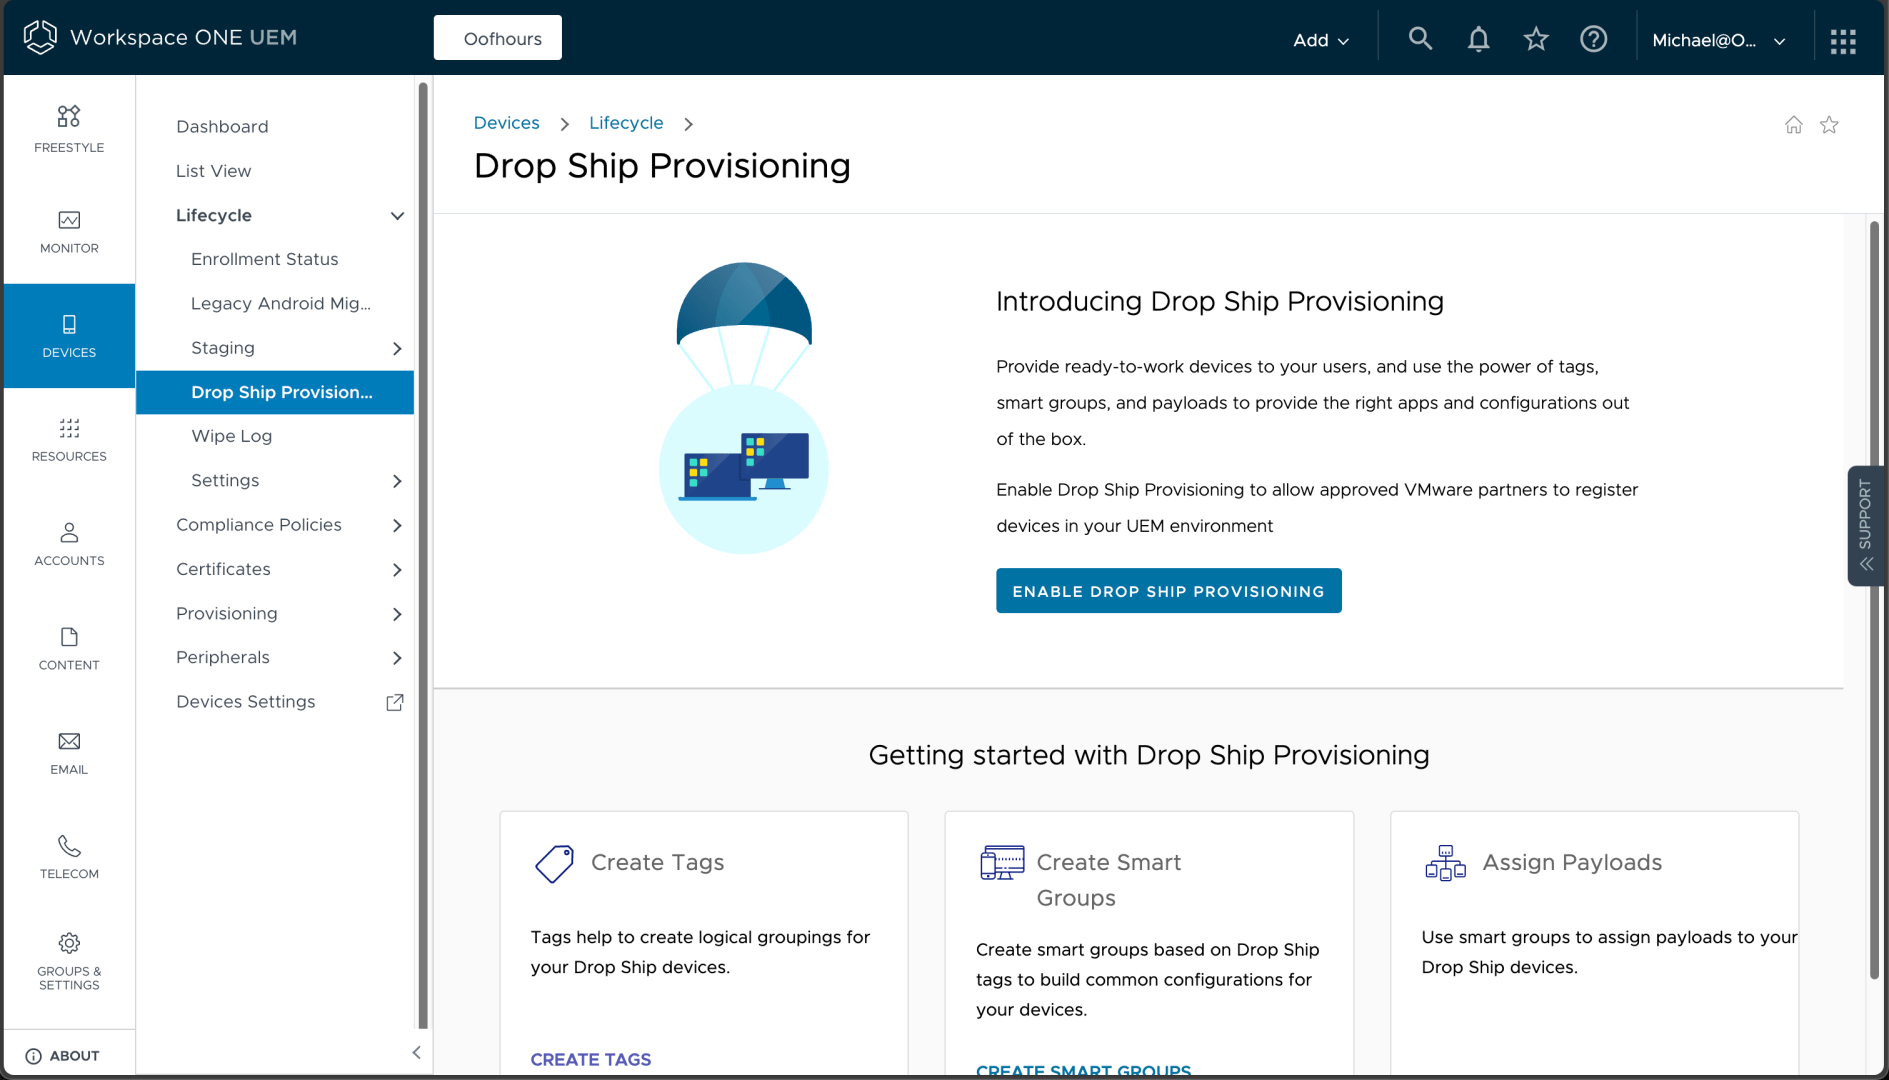
After clicking the “Enable” button you just need to enable and save:

Next I need to create a tag, from Settings -> Devices & Users -> Advanced -> Tags:
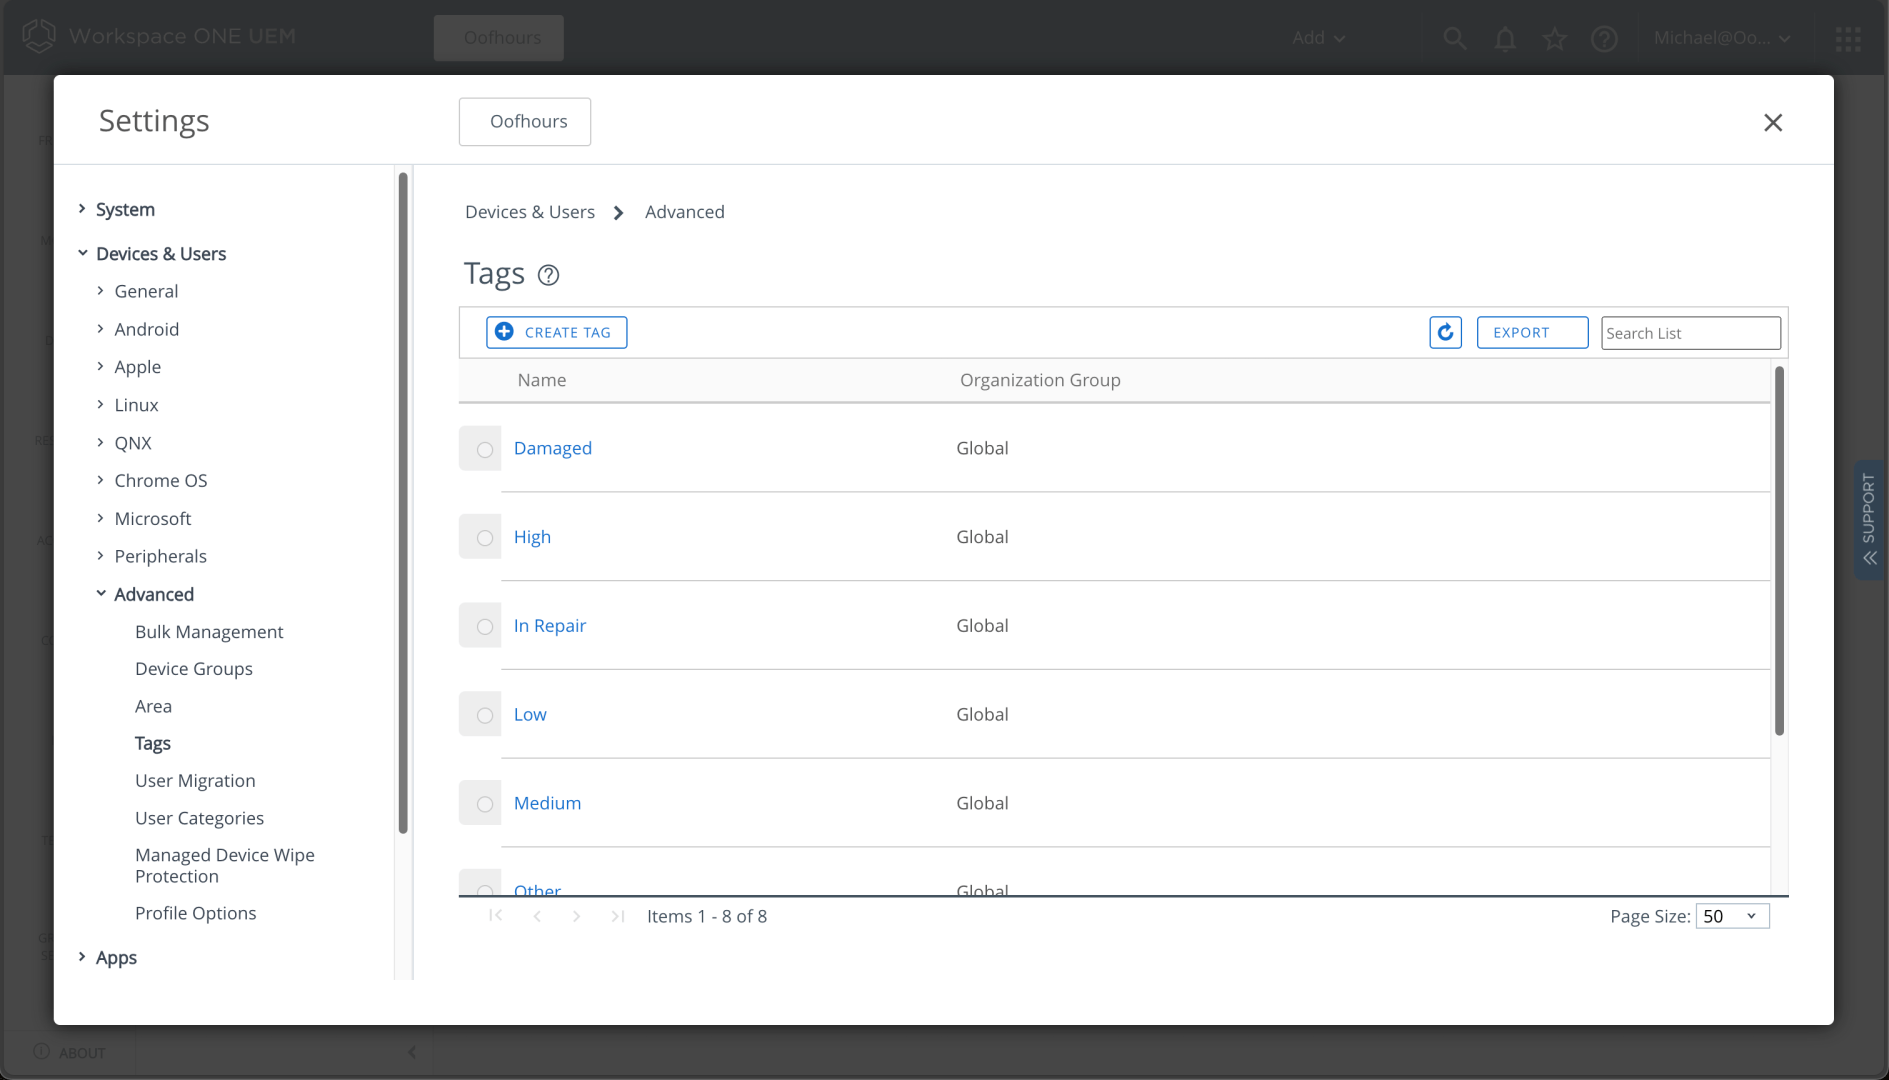
After clicking to “Create Tag” I can specify the tag name. I’ll specify “DropShip” as the tag:

Now I need to create a smart group that is linked to that tag, from Groups & Settings -> Groups -> Assignment Groups:
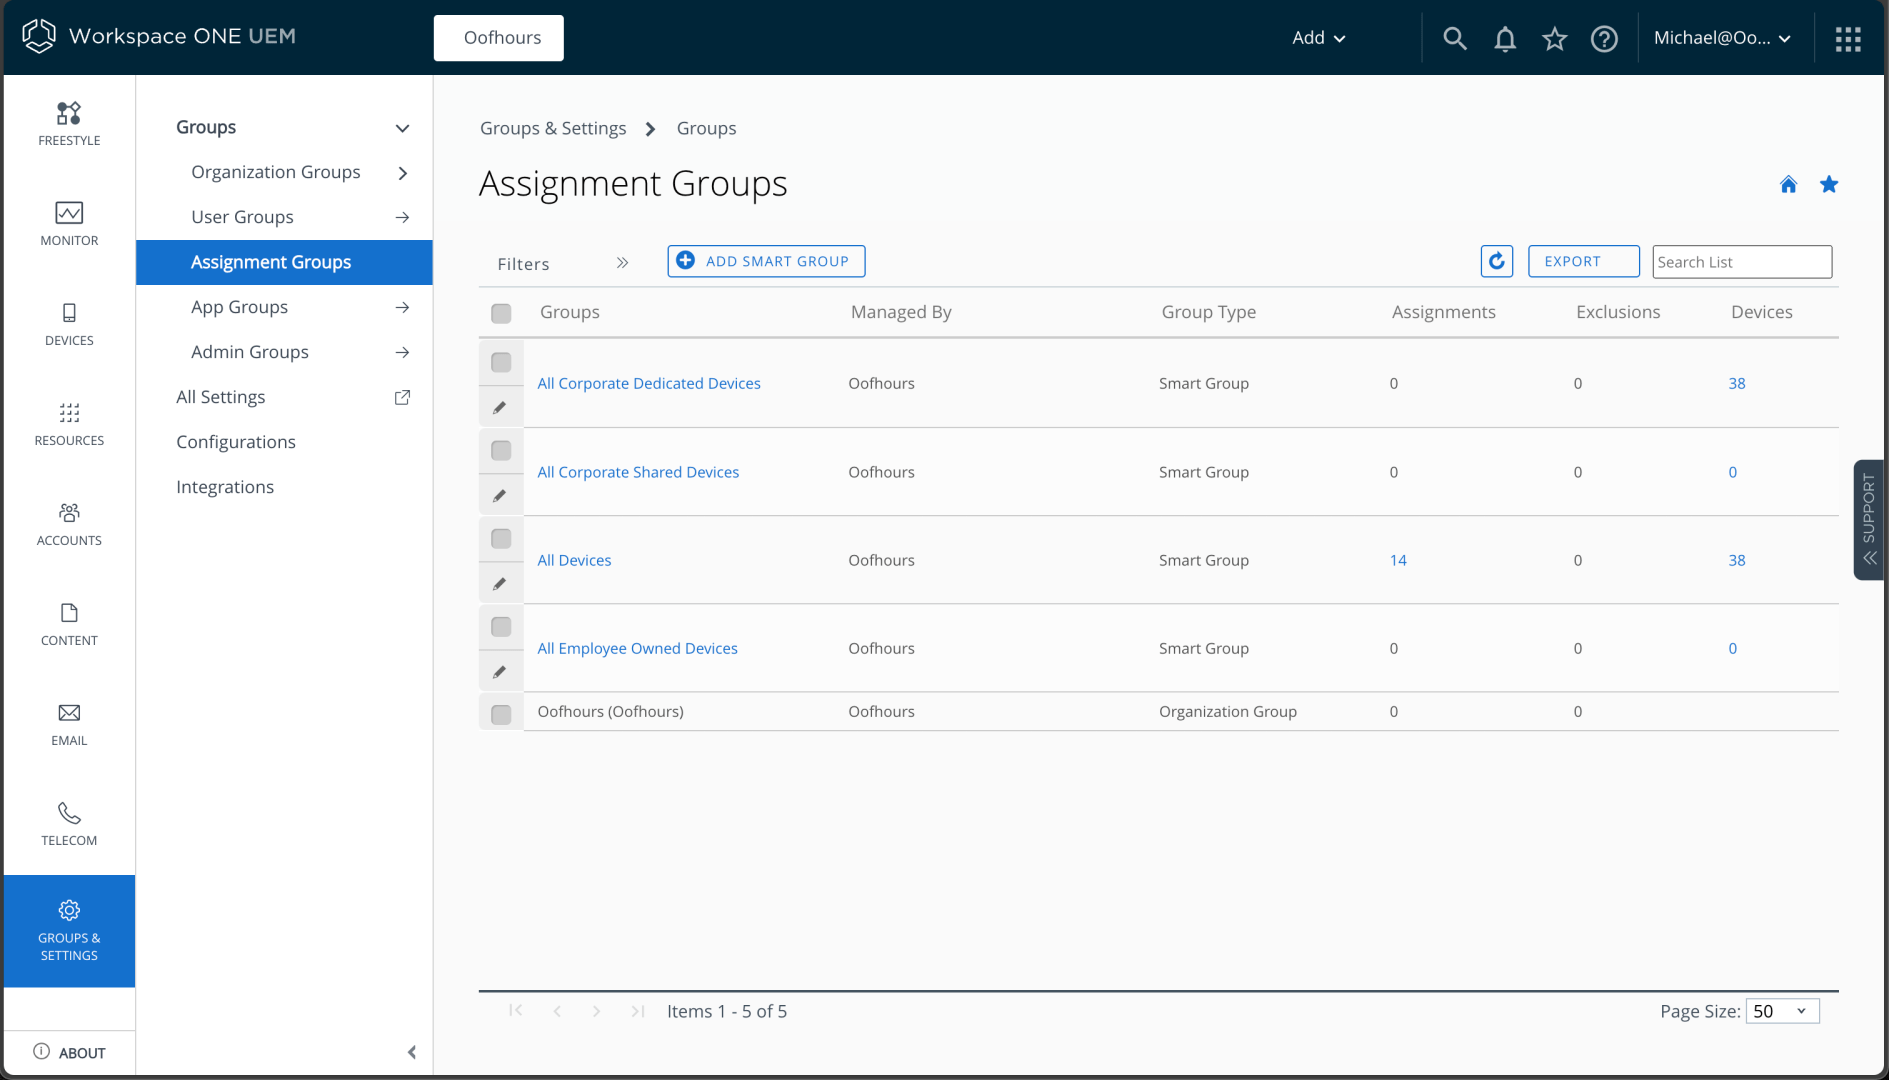
I can click to “Add Smart Group” and fill in the details:
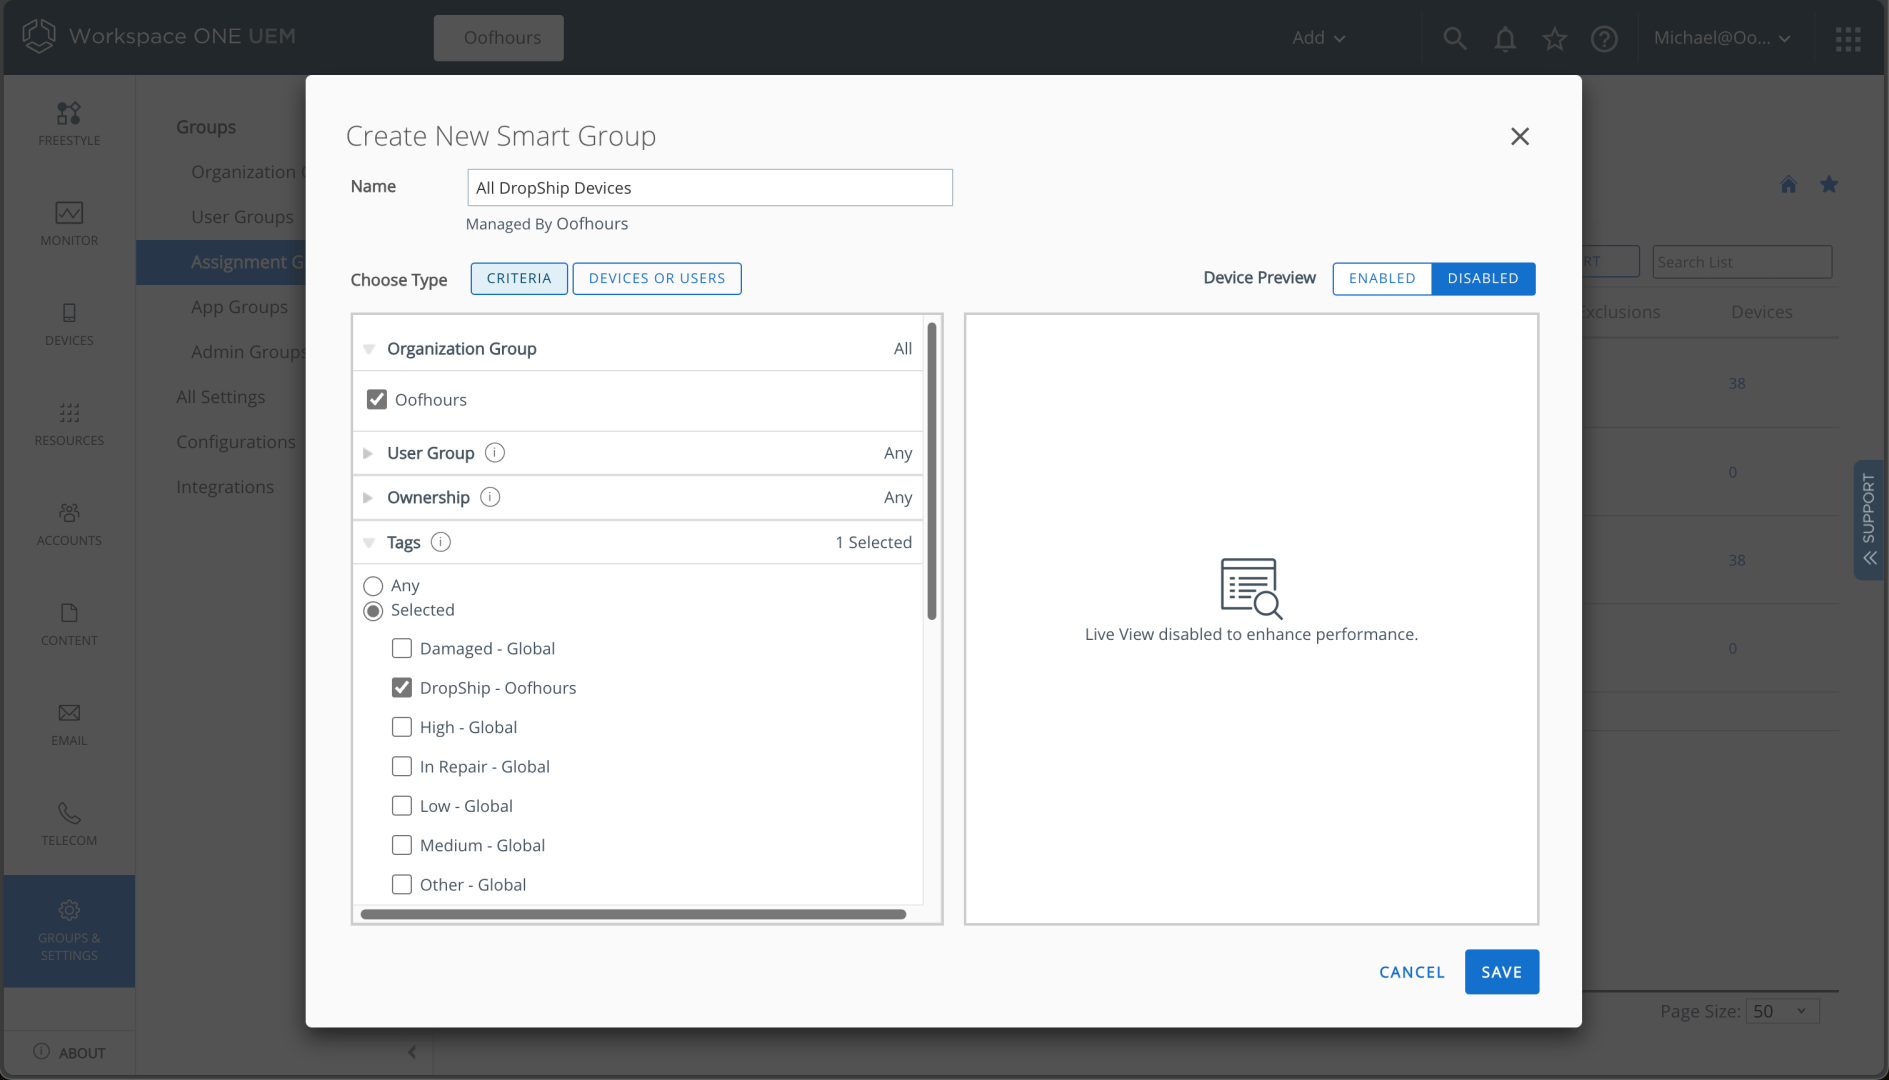
Now I can target any apps or policies that I want to provision to that smart group. (Of course I could use other smart groups too, e.g. All Devices.)
Now I need to prepare a device. I need to download the provisioning files from the https://resources.workspaceone.com/ website as indicated in the documentation:

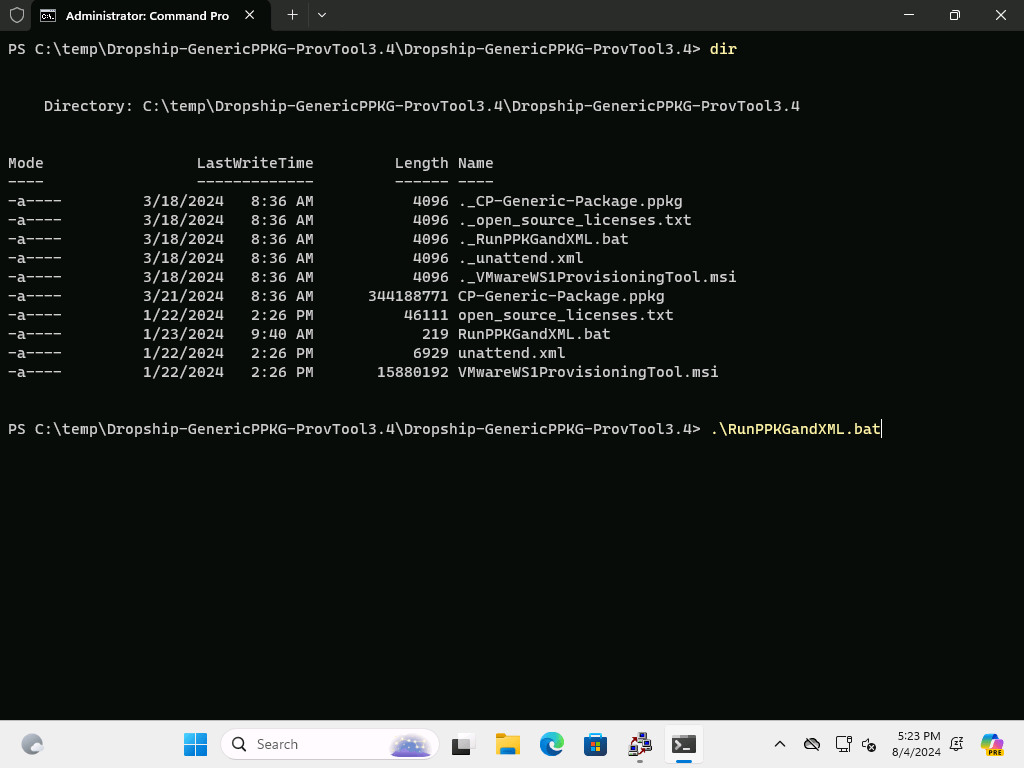
On a virtual machine, I can press Control-Shift-F3 in OOBE to enter audit mode. Once there, I can open a command prompt and extract the contents of the downloaded zip file into a temporary folder. From there, I can run the included RunPPKGandXML.bat to set up the device:
That performs an installation:

Once that is finished, it will sysprep the OS so that it is ready for the provisioning process. (If you were mass-producing machines with this, you could capture an image of the device after it shuts down, then apply that image to each machine. OEMs would typically do something similar to that in the factory.)
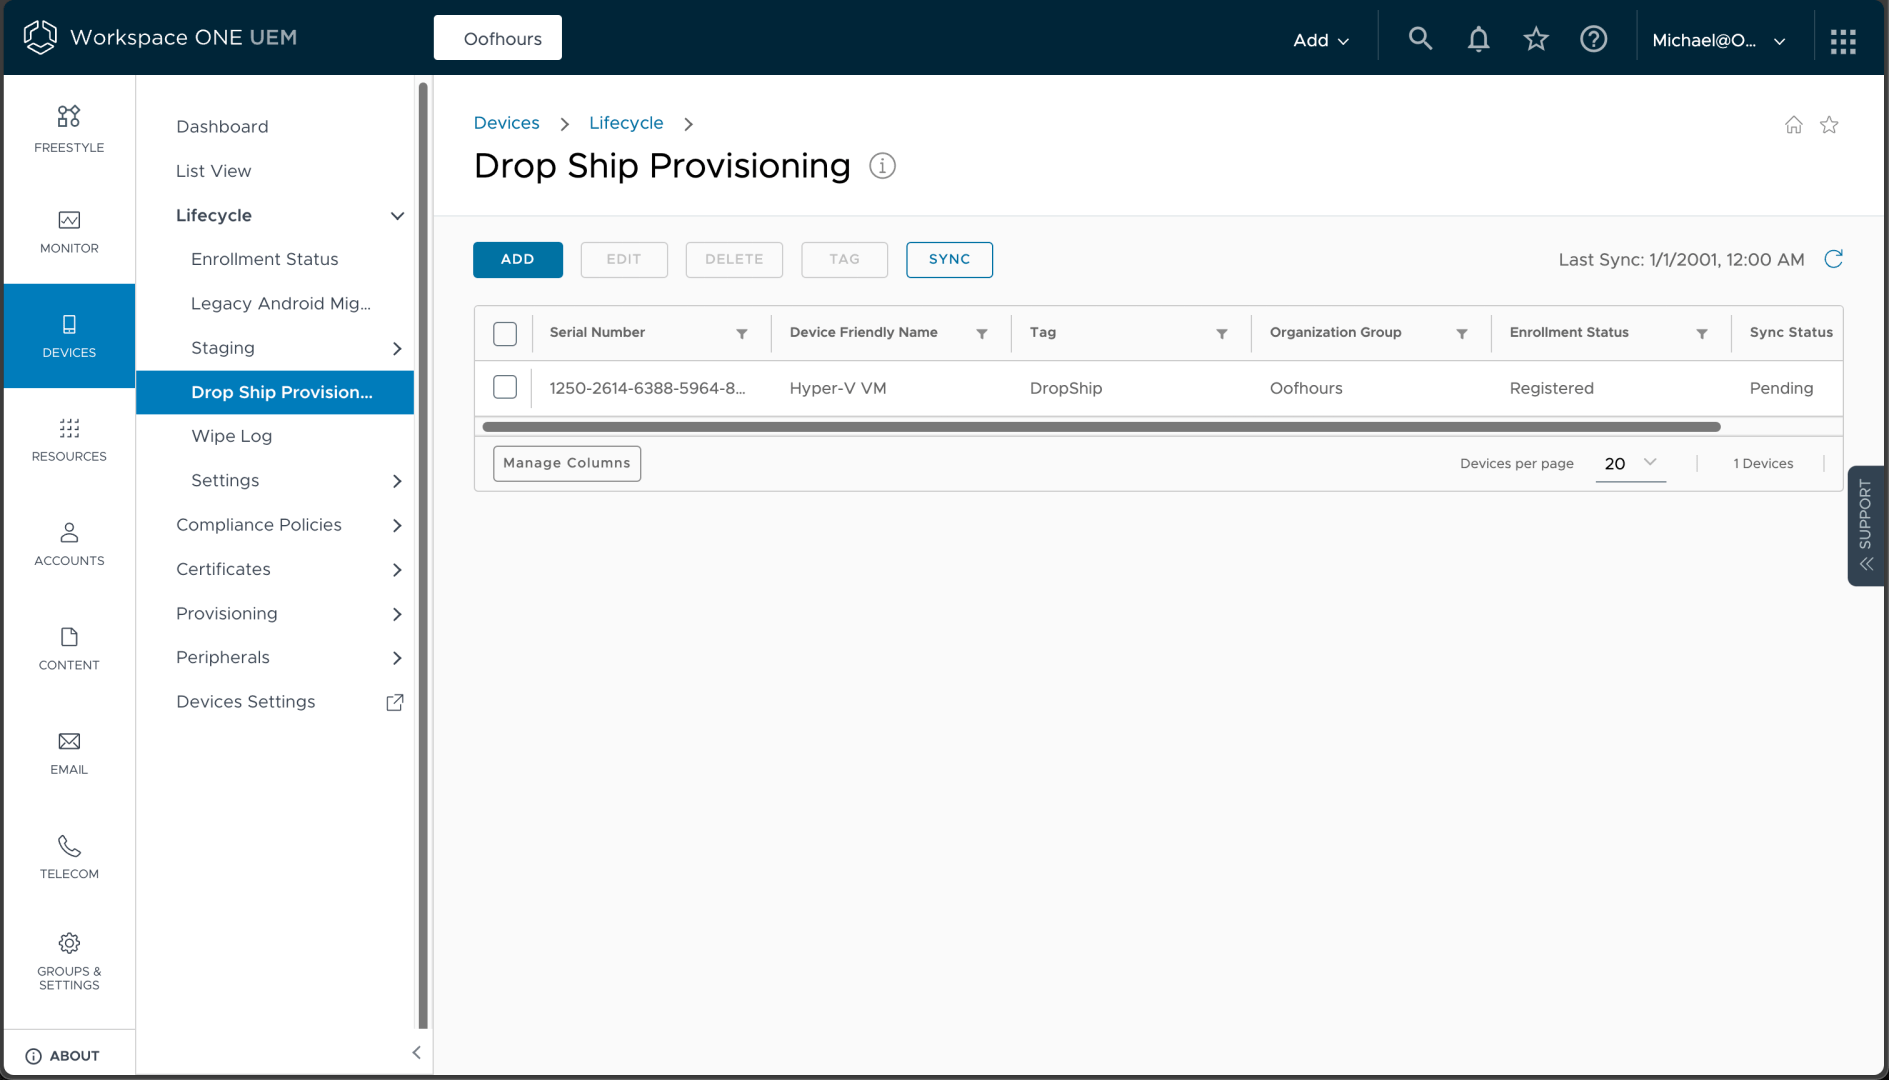
Next, I need to register the device and assign it a tag.

From the resulting list of devices, I can click “Sync” to ensure that the Workspace ONE service knows about the new device. (This would eventually happen automatically, so this just hurries things along.)
When the device starts up, it installs the provisioning tool, reboots, logs in automatically using a local user, enrolls the device, installs the Workspace ONE Intelligent Hub app, and then performs the remaining provisioning steps:

Once the process is complete, there will be a green notification page:
At that point, the device can be shut down and sent to the user.
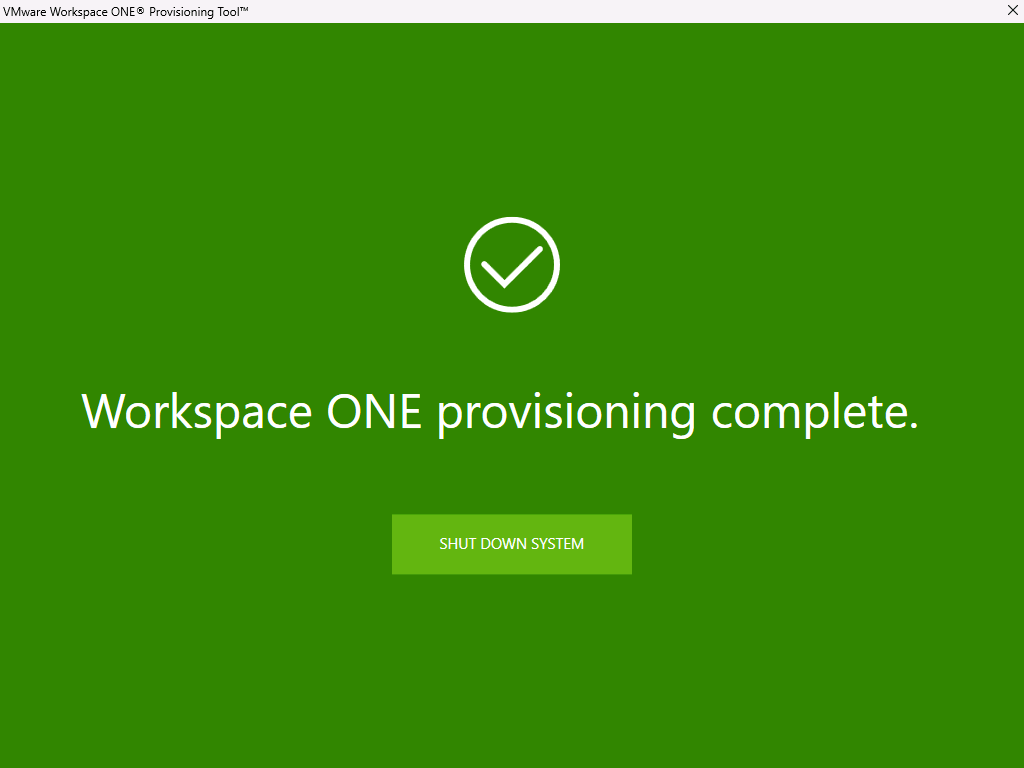
Just like Windows Autopilot pre-provisioning in Windows 10, you’ll get a green screen if everything is successful, and a red screen if there was a failure. This is useful when you’re doing a bunch of machines at once, since you can see from a distance which machines are done and which are still processing. If you are color-blind, well, you’ll have to depend on the icon and get a little closer to each machine. (Autopilot removed the colors in Windows 11 — the UI designers finally prevailed in that battle.)
And with that, my walkthrough of Windows device provisioning with Workspace ONE is complete.