

We all test with virtual machines whenever possible, right? I know I always have, and for expediency I typically went through this process:
- Create a new VHDX file from the latest Windows 11 ISO downloaded from https://my.visualstudio.com, since these are fully-patched. You can use the Convert-WindowsImage.ps1 script on GitHub to do that.
- Create a new VM with no attached disk. Tweak it to add a second processor and a TPM, and configure it to use standard checkpoints. Add a differencing disk that uses the VHDX file created in the previous step. Don’t attach the network adapter to a network (avoids the machine deciding that it is “not an Autopilot device,” a state that requires a reboot to fix).
- Boot the device and wait until it gets to the first page of OOBE, but don’t navigate forward.
- Create a checkpoint.
That gets the VM into a reusable state. You can then go through the device registration process:
- While at the first page of OOBE, connect the network adapter to a network that has internet access.
- Press Shift-F10 to open a command prompt.
- Run “powershell.exe” to start PowerShell.
- Execute “Set-ExecutionPolicy Bypass” to enable scripts.
- Install the Autopilot registration script using “Install-Script Get-WindowsAutopilotInfo -force”. Then run “Get-WindowsAutopilotInfo.ps1 -online” and sign into AAD with an appropriate account that has rights to register the machine.
- Make sure the computer object is added to an AAD group that gets an Autopilot profile assigned to the device.
- Revert the machine to the checkpoint.
At this point, you should be able to walk through OOBE. It will prompt to have you connect to a network, so do that, and then it will download the Autopilot profile. When you want to do it again, revert back to the checkpoint and do it again.
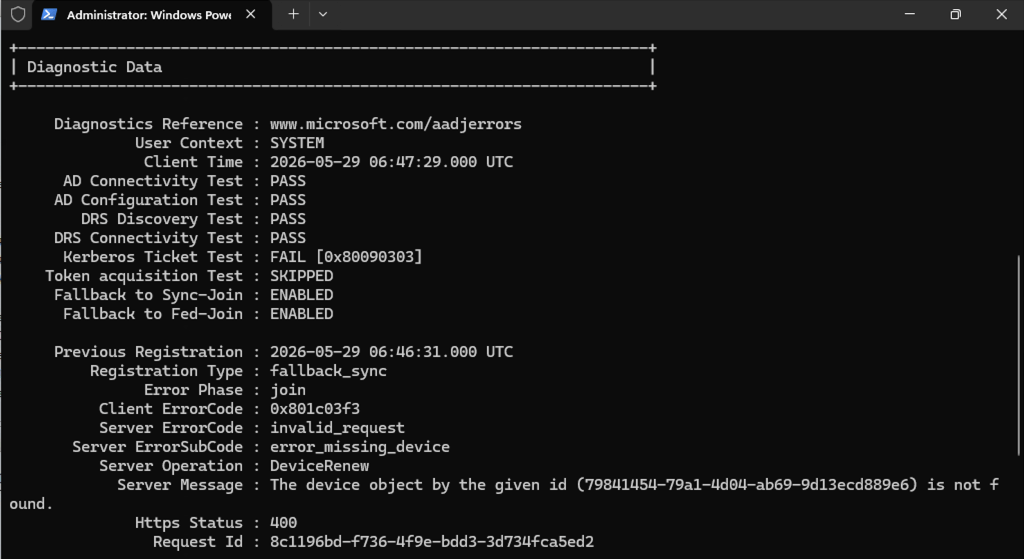
At least that’s the process that I used to do. With a Windows 11 22H2 VHDX patched to the current August cumulative update, this process works fine — but only once. After that, the machine will be in a “Fix pending” state and it will never get an Autopilot profile again unless you effectively start over (deregister/re-register). That’s fairly time-consuming.
So what’s going on here? There’s some new logic in Windows Autopilot that Rudy Ooms explains in his blog, related to a UEFI variable named the AUTOPILOT_MARKER. In effect, the device is “permanently” tagged to indicate that it is an Autopilot device:
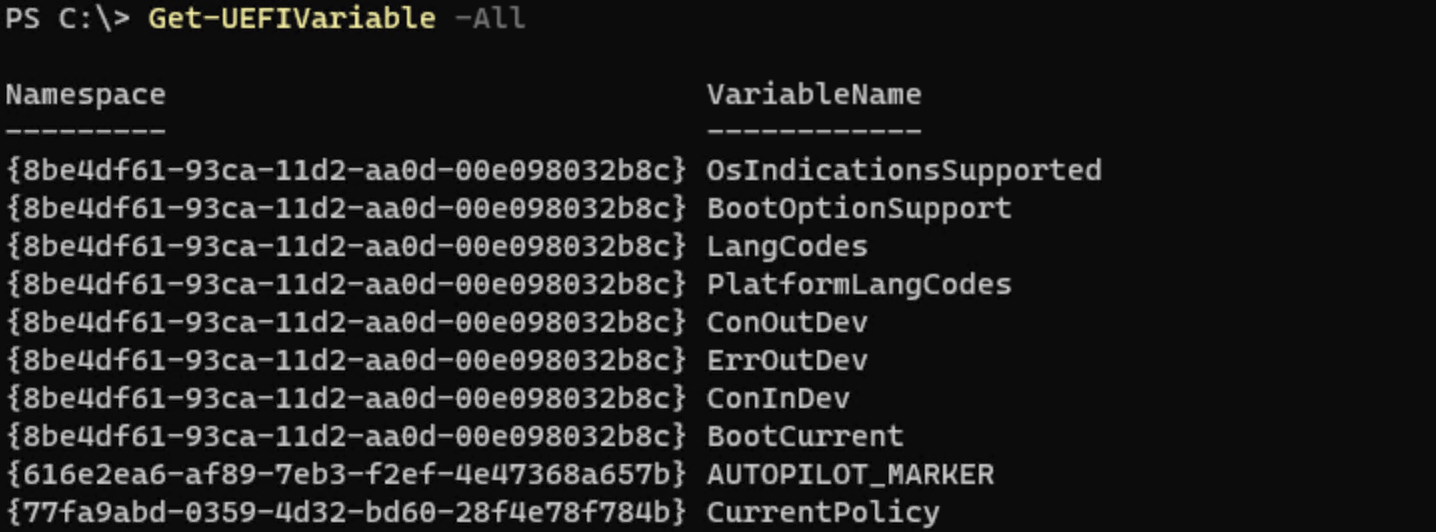
On “real” hardware, if that AUTOPILOT_MARKER were to disappear, it likely means that the motherboard has been replaced and the device needs to be re-registered, which is something that Autopilot can try to do automatically. But in the virtual machine case, reverting the VM to a previous checkpoint causes that marker to disappear, hence that same re-registration “repair” process tries to kick in. But we reverted the machine to a checkpoint, so that repair can never happen. And with the device stuck in that state, it will never get an Autopilot profile — it will just go through OOBE as a non-Autopilot device. (That just feels wrong/half-baked.)
So how do we work around this? Well, we need to make sure that marker is preserved. So we need to alter the process:
- Create a new VHDX file from the latest Windows 11 ISO downloaded from https://my.visualstudio.com, since these are fully-patched. You can use the Convert-WindowsImage.ps1 script on GitHub to do that.
- Create a new VM with no attached disk. Tweak it to add a second processor and a TPM, and configure it to use standard checkpoints. Add a differencing disk that uses the VHDX file created in the previous step. Attach the network adapter to a network with internet access.
- Boot the device and wait until it gets to the first page of OOBE, but don’t navigate forward.
- Press Shift-F10 to open a command prompt.
- Run “powershell.exe” to start PowerShell.
- Execute “Set-ExecutionPolicy Bypass” to enable scripts.
- Install the Autopilot registration script using “Install-Script Get-WindowsAutopilotInfo -force”. Then run “Get-WindowsAutopilotInfo.ps1 -online” and sign into AAD with an appropriate account that has rights to register the machine.
- Make sure the computer object is added to an AAD group that gets an Autopilot profile assigned to the device. Wait for the profile assignment to complete. (You could do this with the Get-WindowsAutopilotInfo script too.)
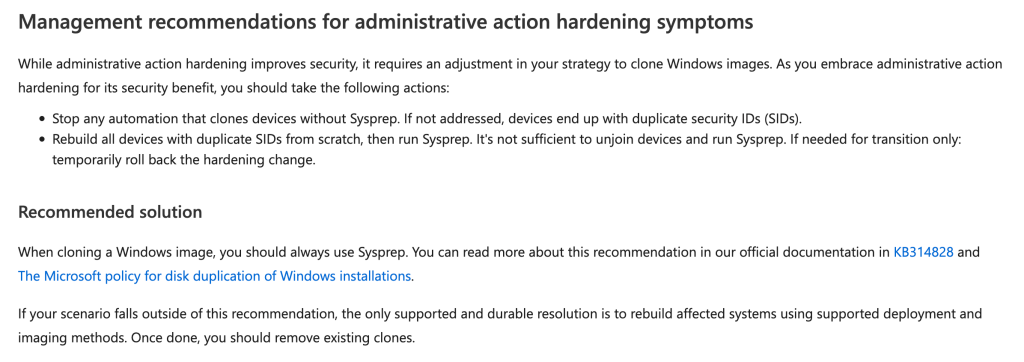
- Run “c:\windows\system32\sysprep\sysprep.exe /generalize /oobe /shutdown”
- Either disconnect the network adapter (if you want it to always prompt, e.g. to test internet vs. on-prem scenarios or if you plan to change the Autopilot profile at any point) or not; leave the machine powered off or boot it to the first screen of OOBE (your preference, but remember if you boot it to OOBE and have a network connection, it will have a cached Autopilot profile that won’t go away without a forced reboot). My preference: no network, booted to the start of OOBE.
- Create a checkpoint.
Now we should be able to repeat the Autopilot process over and over again.


12 responses to “Windows Autopilot testing with VMs”
“Creates a bootable VHD(X) based on Windows 7 or Windows 8 installation media.” 😀
LikeLike
Yeah, the script was orphaned by the original creator. A few people have updated it since, so you get your choice of fixed versions.
LikeLike
Hi Michael, just tested this out with the latest Win10 image but it’s not working for me. Once I revert to the checkpoint, it doesn’t recognize the device anymore and hence I am not getting the Autopilot profile downloaded.
During your steps, at what point does the UEFI marker get created? Reading through your steps, it appears that an AP profile is never downloaded before creating the Checkpoint, so I am not sure I understand when and how that marker would be created.
Thanks,
Jan
LikeLike
Looks like it’s working for me now. I believe the issue was that I wasn’t ‘Internet connected’ during the initial boot to OOBE. That’s when the AUTOPILOT_MARKER seems to get created.
Thanks for your help with this, much appreciated!
LikeLike
Any insight or limitations with using VMWare vSphere? Assuming your instructions are applicable for any hypervisor. We are just mounting a Windows 10 22H2 ISO to install Win 10 Pro then following your steps.
When running “Get-WindowsAutopilotInfo.ps1 -online”, we get “Process is terminated due to stackoverflowexception”. Haven’t seen this on any other machines and tried reimaging the VM a few times. The culprit seems to be Connect-mggraph. Running that separately we get the same powershell crash and no AAD authentication prompt. Tried to work around this by getting the hardware hash and uploading but it’s not downloading the Autopilot profile and getting to the “Welcome To” screen. Firewall or decryption shouldn’t be coming into play either.
Appreciate the help.
LikeLike
Disregard my previous message it was SSL decrypt after all (I didn’t catch it because of firewall rule processing order). Feel free to post if it’s helpful for someone else.
LikeLike
Hi Michael,
So i’ve been testing this and reading some about this autopilotmarker. So it looks like when autopilot marker is once set, then it would depend on it and when resetting the device to a version of Windows before the autopilotmarker is introduced would break the download request of the Autopilot profile.
If this is true then uploading a hash to the autopilot service from a Windows version before autopilotmarker is introduced might be the trick?
Where is the marker stored in the autopilot service?
LikeLike
Upload a hash from an earlier version does not work either. As soon as the marker is set with an older version it’s there to stay and will depend on it…
LikeLike
Yeah, the marker is stored in the UEFI firmware and can never go away unless you want to remove and completely reregister the device. For VMs, that means you must create a checkpoint after the marker has been created.
LikeLike
But the marker must be stored online as well, as it will verify with it right? 21h2 install does not have the marker and Autopilot download will fail (if previously downloaded a 22h2 with autopilotmarker profile). Did you manage to find out where it is stored online?
So you need seperate VM’s for older versions of Windows (for example 21h2) or is there another way?
LikeLike
So i figured out it’s also the other way around.
Upload a 21h2 hash and create a snapshot does not have the UEFI Autopilotmarker variable stored. If you then install Windows 22H2 (updated version) will have the variable and autopilot profile download will fail.
Upload a 22h2 (updated version) hash will have the UEFI Autopilotmarker stored. If you then revert to a snapshot with or install to 21H2 download of the autopilot profile will also fail, because it does not have the marker.
So i quess the only way is to use seperate vm’s as you cannot undo the marker or flag from the autopilot service?
LikeLike
Yeah, it’s tricky if you upgrade versions. I just moved to 22H2 and got rid of all my older VMs.
LikeLike