Some people may think some of my past posts get into the weeds, exploring the technical depths of Windows Autopilot, Intune, Windows 10, ConfigMgr, etc. But I would say those generally only get to the 300-level – I will leave out the really deep stuff because it can be harder to explain, and some people just might not care. But every so often, in an effort to maintain my sanity, I like to dive into a new topic to prove that I am still capable of learning new stuff and spending more than 30 minutes on said topic. And in this case, anyone reading this blog post will be coming along for the ride. We’ll see how many people make it all the way to the “end of the road.”
So what’s the topic? Something that I started talking about almost 10 years ago, the Unified Extensible Firmware Interface (UEFI). Back then, it was more of a warning: The way you deploy Windows is going to change. Now, it’s a way of life (and fortunately, it no longer sucks like it did back in 2010 when we first started working with it).
I don’t want to rehash the “why’s” behind UEFI because frankly, you no longer have much of a choice: All new Windows 10 devices ship with UEFI enabled by default (and if you are turning it off, shame on you). Instead, I want to focus much more on how it works and what’s going on behind the scenes.
Chapter 1: The boot process
According to the UEFI spec (which is a really hard to follow document), a device will initially start up and look for a particular file based on the architecture of the system:
| Architecture | File |
| x86 (32-bit) | bootia32.efi |
| x64 (64-bit) | bootx64.efi |
| ARM (32-bit) | bootarm.efi |
| ARM (64-bit) | bootaa64.efi |
It will look in the \EFI\BOOT folder on accessible FAT32 volumes for this file. (The firmware can only read FAT32 file systems. GPT disks are suggested, although interestingly enough MBR disks would probably work too, at least per the UEFI spec.) That’s effectively a fallback mechanism – if nothing else loaded, search out something. But once you’ve installed an OS on the device, it will create firmware entries that provide alternative choices; UEFI will work its way down the list until it successfully loads one. Here’s what you would see for that firmware order on a Hyper-V VM that’s already running Windows 10:

Notice that the first entry in the list points to \EFI\Microsoft\Boot\bootmgfw.efi, the Microsoft-provided boot manager; it then decided what OS to boot from the BCD. An interesting fact: If you look at the bootmgfw.efi file and compare it against the bootx64.efi file (you’ll have to assign a drive letter to the EFI partition to see these files), you’ll notice that they are exactly the same size:

That’s not a coincidence – they are actually the exact same file. So whether it’s loaded as a “last resort” by the firmware (bootx64.efi) or by the explicit firmware entry doesn’t matter, it does the same thing either way.
The boot manager will then boot an OS based on the BCD entries. For a Windows 10 OS, there will be an entry in the BCD that points to a particular volume as well as the path of the Windows boot loader that actually boots the OS, which is typically \windows\system32\winload.efi on that volume. Here’s the entry from my laptop:

Behind the scenes, that “partition=c:” entry really points to the ID of the volume (since drive letter assignments depend on the OS mappings, not the BCD or loader); BCDEDIT is making it more friendly. When winload.efi is loaded, it will find the actual Windows kernel and load it, which starts the actual OS boot process.
There’s one other interesting file that can come into play, hvloader.efi. This one is tied to the “hypervisorlaunchtype” BCD setting about. This one is for the Hyper-V hypervisor. The winload.efi boot loader will check this setting and automatically load hvloader.efi to launch the hypervisor. The exact mechanism for that isn’t 100% clear to me – that was a rabbit hole I didn’t want to go down.
One other point worth mentioning in this process: If secure boot is enabled, all of the mentioned files will be checked to make sure that they are properly signed and unmodified. If the boot process gets far enough for the NTOS kernel to run, it will also perform verification of critical boot files. This is a key UEFI and Windows security feature, and why you should always run with UEFI and Secure Boot enabled, except when testing or playing (and we’ll do plenty of that later).
Chapter 2: What are these EFI files anyway?
I remember reading in the UEFI specifications a long time ago that UEFI used “EFI byte code” (EBC). That would mean special tools, compilers, etc. Well, I was wrong. Yes, such a thing exists, but it’s primarily for cross-platform drivers, and apparently is not used very often. So these EFI files (like bootmgfw.efi) are just typical executables, and can be written in any language and compiled into something that’s pretty close to a standard binary. C and assembly language are the most common languages used, and both are used in the source code for UEFI itself (the EDK2 repository, part of the Tianocore project).
At the moment at least, my interest isn’t in writing UEFI code. But there is one piece of UEFI code that would come in very handy to explore some of the “behind the scenes” operations of UEFI: the EFI shell. Think of this as a sort of “UEFI command prompt” that has a number of built-in commands for working with UEFI itself. The source code is included in the EDK2 project, it just needs to be built (compiled/linked).
OK, so how to build it? There are some instructions in the Tianocore Github content. Those instructions are OK, but not perfect. Here’s a high-level summary of what I did:
- Install Visual Studio 2019 (even though it isn’t listed as officially supported in the EDK2 documentation – that stops at Visual Studio 2017). Make sure you install the desktop development tools. (I included MSVC v141, which is the VS2017 version. I think that was necessary, just didn’t take the time to prove it.)
- Install Python 3.7 or later to C:\Program Files\Python37. Set a system environment variable PYTHON_HOME to “C:\Program Files\Python37” (without the quotes, without a trailing backslash).
- Install the NASM open-source assembly compiler to C:\Program Files\NASM. Set a system environment variable NASM_PREFIX to “C:\Program Files\NASM\” (without the quotes, with the trailing backslash).
- Install the ASL compiler to C:\ASL
- Install Git GUI.
- Clone the EDK2 repository from Git GUI, specifying a source location of https://github.com/tianocore/edk2.git and a target of C:\EDK2.
- Edit the “C:\EDK2\Conf\target.txt” file to specify the following values:
ACTIVE_PLATFORM = MdeModulePkg/MdeModulePkg.dsc
TARGET_ARCH = X64
- Open an elevated command prompt and change to the C:\EDK2 directory
- Run “edksetup.bat Rebuild”.
- Run “build”.
If all of that works, you should then have a full build of the main UEFI code. But you still won’t have the UEFI shell. So a little more is required:
- Open an elevated command prompt and change to the C:\EDK2 directory
- Run “edksetup.bat”.
- Run “build -p ShellPkg\ShellPkg.dsc”
After doing that, you should find the resulting shell.efi file in C:\EDK2\Build\Shell\DEBUG_VS2017\X64\ShellPkg\Application\Shell\Shell\DEBUG. Now, let’s try to use it…
Chapter 3: Booting to the EFI shell
Let’s start off with something really simple: A brand-new VM with no operating system on it. Based on the previous discussions, all we should need to do is create a FAT32 disk, place the EFI file in the right place, and then boot. So let’s try it. Here are the steps:
- Create a new VM in Hyper-V (4GB RAM, a small expanding VHDX, gen 2, two processors – typical stuff). Don’t start it yet.
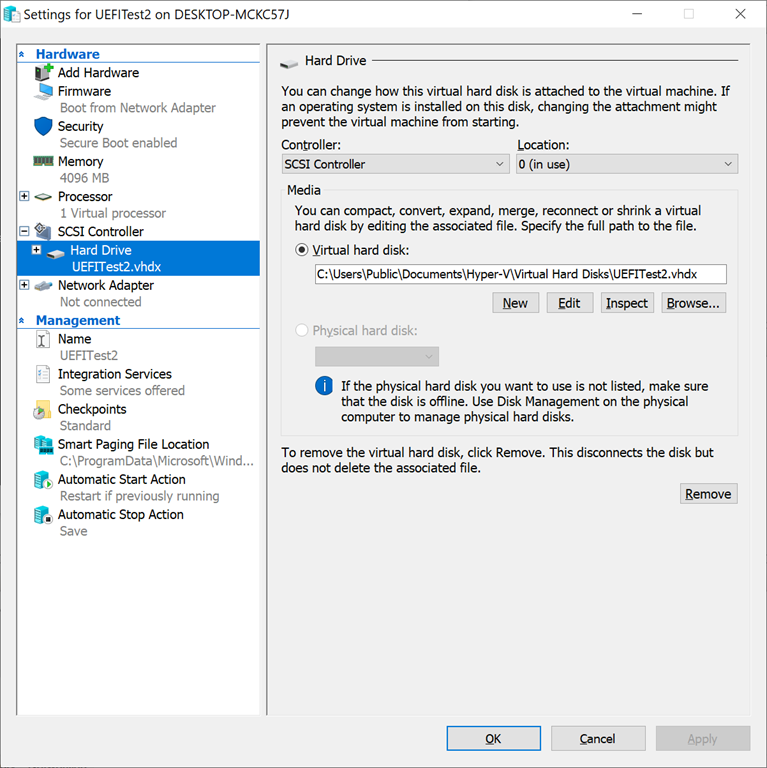
- Find the VHDX file in File Explorer and double-click it to mount it. You’ll get a message like this:
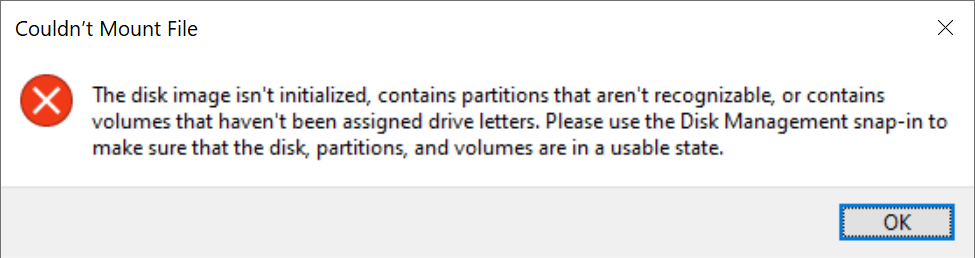
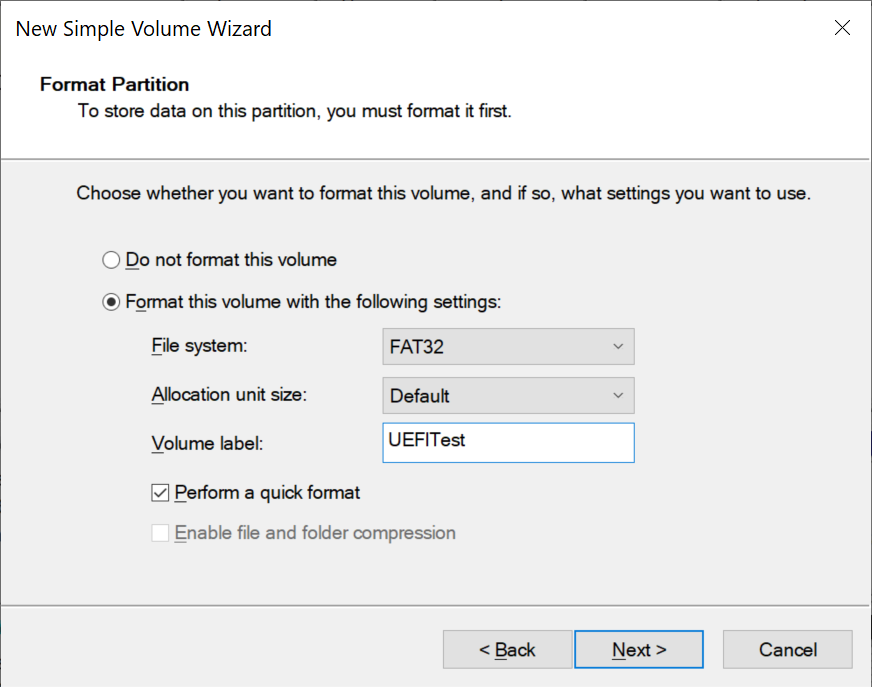
- Do as it says: Open Disk Management, initialize the disk, and then create a small FAT32 partition.
- It should look like this (the E: drive):
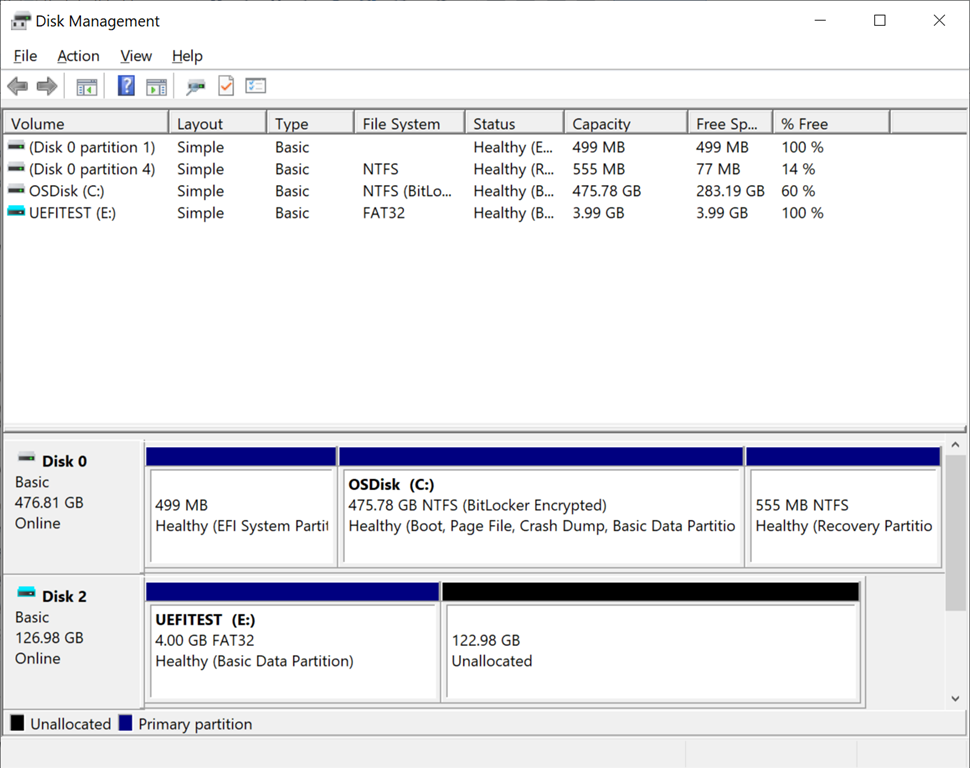
- Navigate to the drive (E: from my example) in File Explorer. Create an E:\EFI\BOOT folder structure, then copy the shell.efi file into it, renaming it to bootx64.efi (remember that from above?).
Directory of e:\EFI\BOOT
09/02/2019 12:08 AM <DIR> .
09/02/2019 12:08 AM <DIR> ..
09/01/2019 12:31 AM 976,960 bootx64.efi
1 File(s) 976,960 bytes
Right-click on the drive (e.g. E:\) in File Explorer and eject it (which unmounts it).
Now you can start the VM – and see it fail with an error like this:
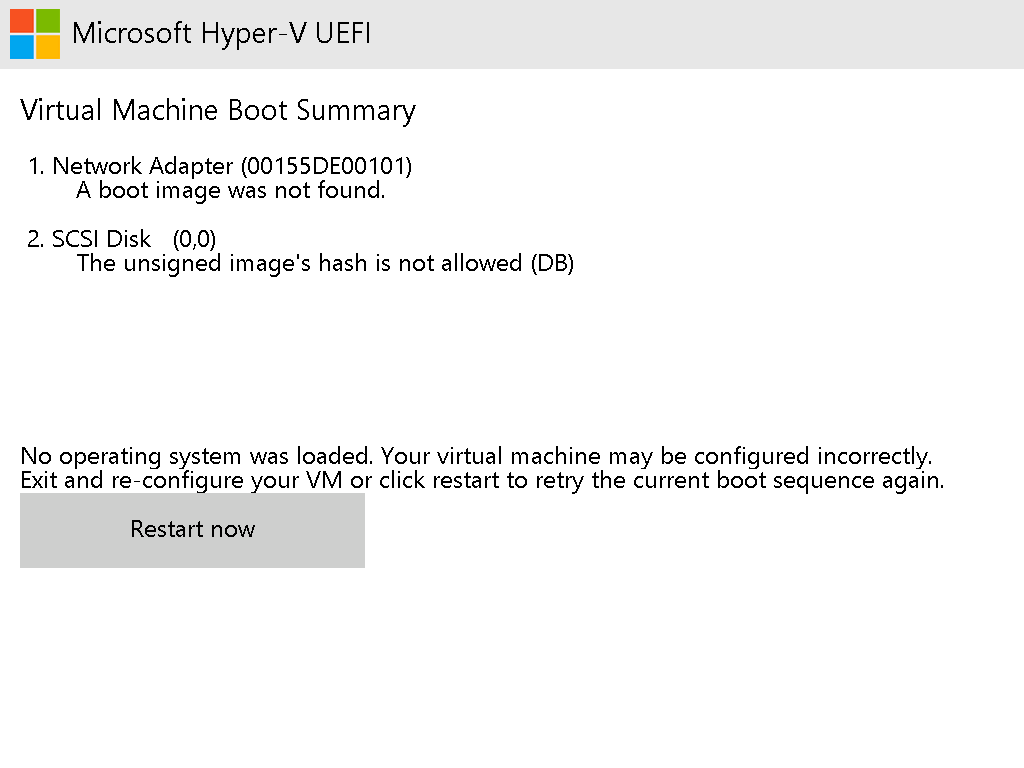
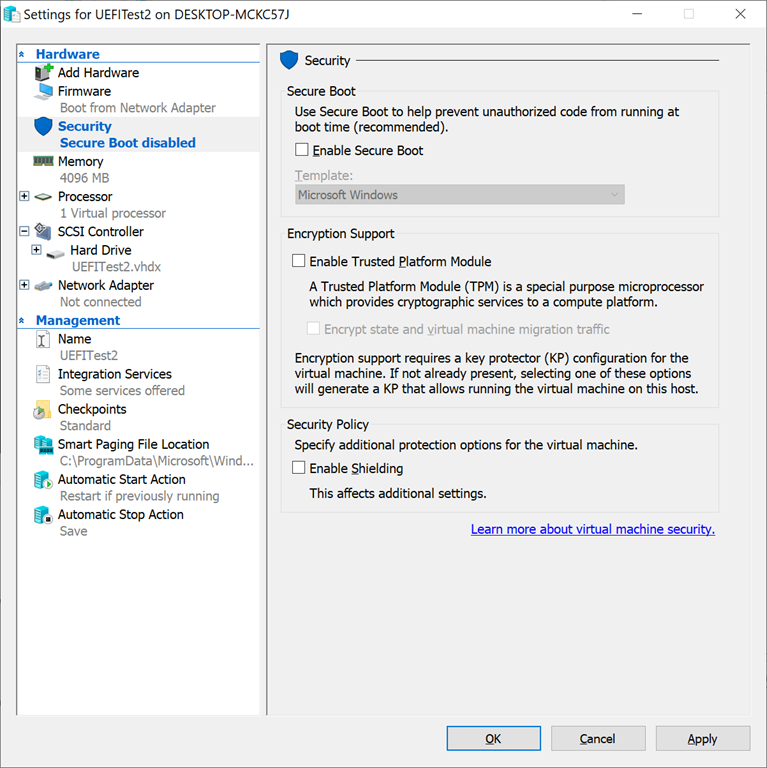
That’s actually a good sign: The UEFI firmware attempted to load the EFI shell (shell.efi renamed to bootx64.efi), but it failed. Any guesses as to why from the error message on the screen, “unsigned image’s hash is not allowed”? Simple, it’s a Secure Boot error. The EFI executable isn’t signed by Microsoft – actually it isn’t signed at all. So to get it to run, we need to turn off Secure Boot. Turn off the VM and change the setting:
Apply the change, then start the VM again. Now we see something much better:

As you can see in that output, the device is running UEFI shell 2.2 (the most recent version of the spec), UEFI 2.7 (pretty recent, there is a 2.8 version now), and Microsoft is the vendor (as expected in Hyper-V). If you look at a directory of the FS0: volume:
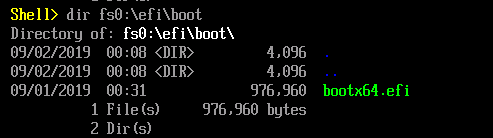
You can see that it is the FAT32 volume that we prepared before, with the renamed shell.efi loaded by the virtual machine automatically.
See page 92 of the UEFI Shell 2.2 spec for all the commands that are accepted. The one that I am most interested in is “dmpstore” because it will dump out all of the UEFI variables. You can specify that you want all variables (-all), and that you want to page through them on the screen (-b, useful to see the names on the screen). Here’s an example from “dmpstore –all –b”:

Let’s interpret a little of that:
- The “NV+BS”, “NV+RT+BS”, and similar strings indicate attributes of the variable. Values include:
- NV = Non-volatile (stored in persistent storage, so available across boots)
- RT = Runtime access (can be queried even after UEFI boot services have completed, e.g. from within Windows)
- BS = Boot service access (can be queried by the boot service executables, e.g. EFI files)
- AT = Authenticated access (requires authentication to read/write value)
- The next field (in between single quotes) indicates the vendor GUID (so that values can be separated by “owner”) and variable name. Those that say “EFIGlobalVariable” use a well-known GUID (see page 80 of the UEFI 2.8 spec for the list of valid global variables – anything not in that list must use a different vendor GUID).
- After that you can see the length of the data and a hex dump of the data itself.
Notice the SetupMode and SecureBoot variables above? Those are mentioned in the Windows secure boot documentation.
So now we know enough to be dangerous. We can build UEFI code, we can run the EFI shell, we can poke around and see the UEFI firmware variables. But now we need to take it a step farther…
Chapter 4: A more real-world example
Using a new, empty VM is useful for testing, but it doesn’t necessarily show a realistic picture of the settings that are in place on a typical device because Windows hasn’t been installed yet. To look at that, we need to use either a real device or a VM that actually has an OS installed. Since I happen to have a real device handy, a Surface Book running a recent Insider Preview build of Windows 10 that I use for testing Windows Autopilot scenarios, that seems like the perfect guinea pig.
For a physical machine, I can actually boot the device from a USB key containing the EFI shell. To do that, I just need to format a USB key as FAT32 and then create the same file structure on it as I did in the empty VM, where again that bootx64.efi file is the renamed shell.efi that had been previously built:
Directory of e:\EFI\BOOT
09/02/2019 12:08 AM <DIR> .
09/02/2019 12:08 AM <DIR> ..
09/01/2019 12:31 AM 976,960 bootx64.efi
1 File(s) 976,960 bytes
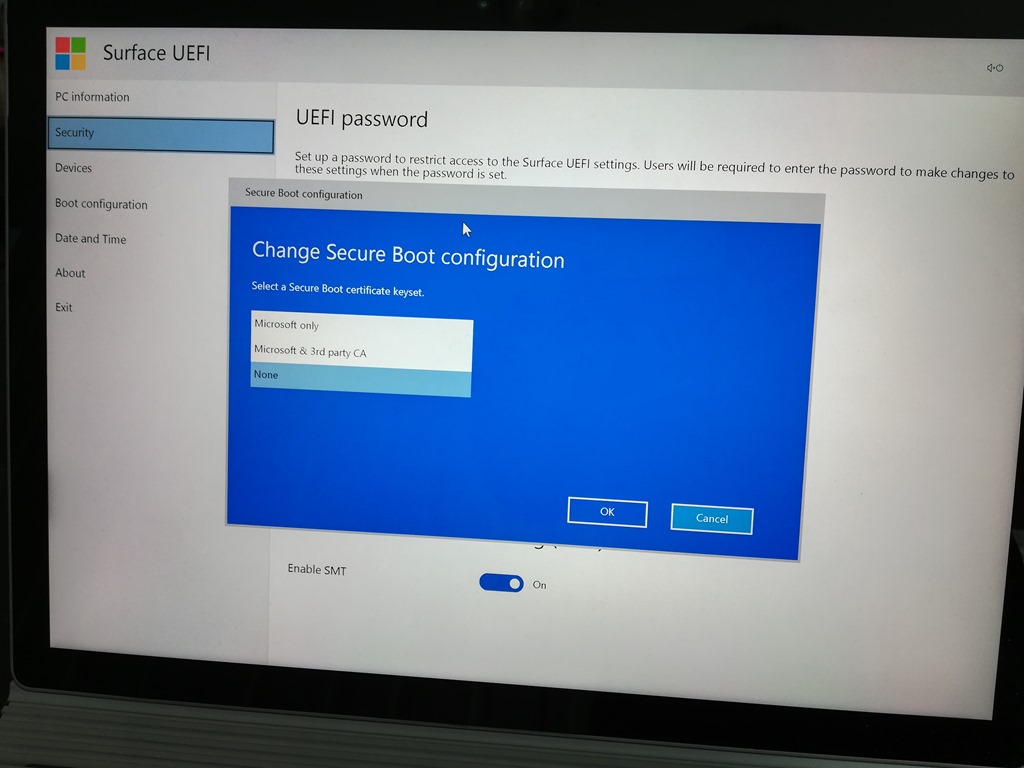
But before we can use that USB key to boot the device, we have to do the same thing on the physical machine as we did on the empty VM: We have to turn off Secure Boot. (Be careful if the device is BitLocker encrypted – you’ll want to suspend BitLocker before doing this, otherwise the device will go into BitLocker recovery mode due to the UEFI tampering. That’s a feature – you would need the BitLocker recovery key to get past it if you didn’t suspend BitLocker first.) On the Surface Book, we can get into the UEFI settings by powering the device on while holding the volume down button. From there, the Secure Boot settings are under Security:
From the Surface UEFI settings, we can also force the device to boot to the USB key. If you navigate to Boot Configuration, you can see the USB drive at the bottom of the list. Swipe left on that one (might take a little practice to get the motion right, it’s a little picky) to get a dialog to boot from it now:
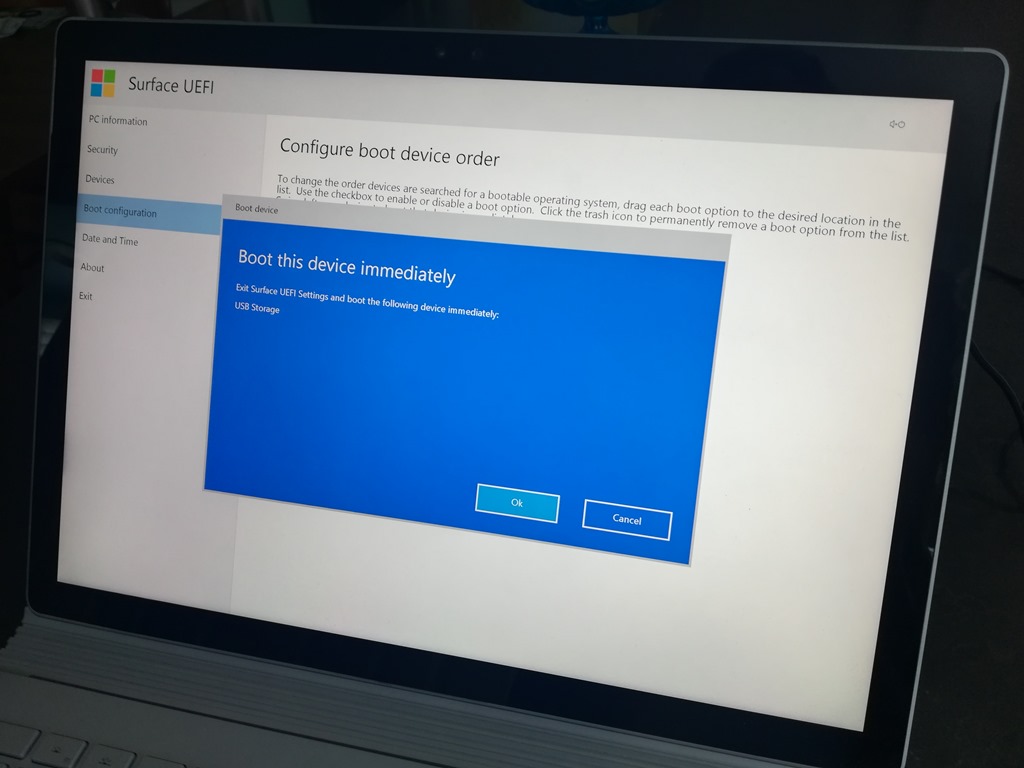
After clicking OK, it boots into the EFI shell – but on such a super-high-resolution display, you might need a magnifying glass to read it:
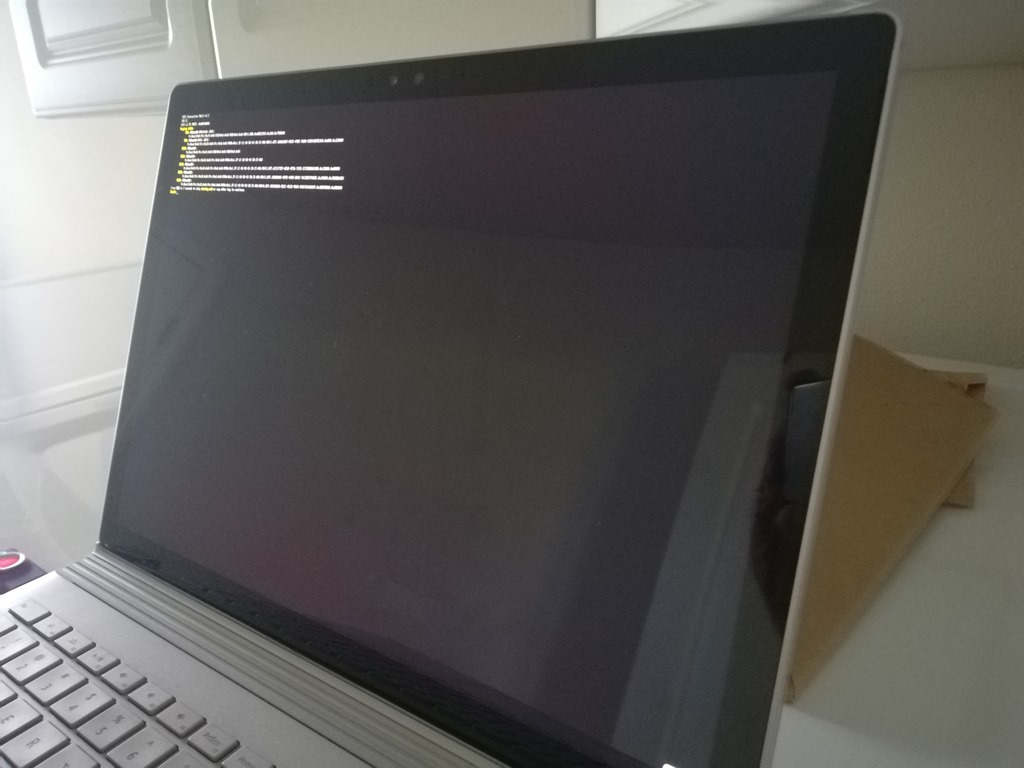
Needless to say, the EFI shell is not high DPI aware. But it is at least functional. From there I can do the same “dmpstore -all -b” command that I used on the VM. (If you leave off the -b switch, expect some pretty painful screen scrolling. While the EFI shell is functional, it’s definitely not optimized for a screen with this resolution.) OK, so now the trick is getting that list into a file, because there’s no way I’m going to type all of those in by hand. Fortunately, the EFI shell supports output redirection (from page 70 of the UEFI shell spec), and the dmpstore command has an option to write out a comma-delimited list, so you can do this:
dmpstore -all -sfo > fs0:\variables.txt
That’s more like it. (FS0: in my case was the USB drive. There was also an FS1:, which was the FAT32 EFI boot partition on the SSD in the Surface Book. I assume that FS0: will also be the device that was used for booting, but make sure you check just in case.) To do a little more “slicing and dicing,” I can import that (renamed to .csv) into Excel so that I can sort, filter, etc. Here’s a quick view:

Now, the fourth column in that list equates to the same attributes that we saw in the virtual machine. (The fifth is the length of the data and the sixth is the hex-encoded data.) Page 241 of the UEFI 2.8 spec has the details on those attribute values:
#define EFI_VARIABLE_NON_VOLATILE 0x00000001
#define EFI_VARIABLE_BOOTSERVICE_ACCESS 0x00000002
#define EFI_VARIABLE_RUNTIME_ACCESS 0x00000004
#define EFI_VARIABLE_HARDWARE_ERROR_RECORD 0x00000008
#define EFI_VARIABLE_AUTHENTICATED_WRITE_ACCESS 0x00000010 //NOTE: EFI_VARIABLE_AUTHENTICATED_WRITE_ACCESS is deprecated
#define EFI_VARIABLE_TIME_BASED_AUTHENTICATED_WRITE_ACCESS 0x00000020
#define EFI_VARIABLE_APPEND_WRITE 0x00000040
#define EFI_VARIABLE_ENHANCED_AUTHENTICATED_ACCESS 0x00000080
Initially I thought I only cared about non-volatile variables (first bit set), but I changed my mind after looking through the list. Those with the second bit set can only be queried by a .EFI app (before the OS loads). Those with the third bit set can be accessed from the running OS. So it’s useful to include those values, as well as the security indicators:
| Vendor GUID | Variable | Attributes |
| 0053D9D6-2659-4599-A26B-EF4536E631A9 | ren | BS+NV |
| 0053D9D6-2659-4599-A26B-EF4536E631A9 | move | BS+NV |
| 0053D9D6-2659-4599-A26B-EF4536E631A9 | mount | BS+NV |
| 0053D9D6-2659-4599-A26B-EF4536E631A9 | mem | BS+NV |
| 0053D9D6-2659-4599-A26B-EF4536E631A9 | md | BS+NV |
| 0053D9D6-2659-4599-A26B-EF4536E631A9 | dir | BS+NV |
| 0053D9D6-2659-4599-A26B-EF4536E631A9 | del | BS+NV |
| 0053D9D6-2659-4599-A26B-EF4536E631A9 | copy | BS+NV |
| 0053D9D6-2659-4599-A26B-EF4536E631A9 | cd\ | BS+NV |
| 0053D9D6-2659-4599-A26B-EF4536E631A9 | cd.. | BS+NV |
| 0053D9D6-2659-4599-A26B-EF4536E631A9 | cat | BS+NV |
| 04B37FE8-F6AE-480B-BDD5-37D98C5E89AA | VarErrorFlag | RT+BS+NV |
| 0C573B77-EB93-4D3D-AFFC-5FEBCAFB65B0 | SecureBootMode | RT+BS+NV |
| 10DEDADC-31C4-497A-858A-9B74FFEDE705 | LastKnownFmpUuid | BS+NV |
| 158DEF5A-F656-419C-B027-7A3192C079D2 | lasterror | BS |
| 158DEF5A-F656-419C-B027-7A3192C079D2 | debuglasterror | BS |
| 158DEF5A-F656-419C-B027-7A3192C079D2 | homefilesystem | BS |
| 158DEF5A-F656-419C-B027-7A3192C079D2 | uefiversion | BS |
| 158DEF5A-F656-419C-B027-7A3192C079D2 | uefishellversion | BS |
| 158DEF5A-F656-419C-B027-7A3192C079D2 | uefishellsupport | BS |
| 158DEF5A-F656-419C-B027-7A3192C079D2 | profiles | BS |
| 158DEF5A-F656-419C-B027-7A3192C079D2 | nonesting | BS |
| 158DEF5A-F656-419C-B027-7A3192C079D2 | path | BS |
| 16BAA8B1-9C7D-47EB-9FCF-630F10A5ADF1 | FmpLsv | BS+NV |
| 16BAA8B1-9C7D-47EB-9FCF-630F10A5ADF1 | LastAttemptStatus | BS+NV |
| 16BAA8B1-9C7D-47EB-9FCF-630F10A5ADF1 | LastAttemptVersion | BS+NV |
| 32A44C47-F438-4359-81CA-9CDA02AFD6A6 | UpdateState | BS+NV |
| 36B6D670-B84A-4B08-933F-8CD8268D574E | TouchSystemVersion | BS+NV |
| 378D7B65-8DA9-4773-B6E4-A47826A833E1 | RTCALARM | RT+BS+NV |
| 3811BE0C-6AEF-44DD-9382-CD99A24C6619 | CurrentMsSurfaceUefiRuntimeModeVariableName | RT+BS+NV |
| 3811BE0C-6AEF-44DD-9382-CD99A24C6619 | PreviousUefiBootRuntimeModeVariableName | BS+NV |
| 3811BE0C-6AEF-44DD-9382-CD99A24C6619 | SignatureSaltVariableName | RT+BS+NV |
| 3A9777EA-0D9F-4B65-9EF3-7CAA7C41994B | UEFIPermissionCurrent | RT+BS+NV |
| 3FEE303F-0B21-4DB0-BE30-998D16515072 | DisplayCalibrationLPFGammaEncodeXBitName | RT+BS+NV |
| 4123DEFC-3EB8-433C-8919-127900CC260F | MsBootNext | BS |
| 41D9F172-A9E9-4F9F-81A9-133E2D5902D4 | BatteryLimitEnable | RT+BS+NV |
| 4BC18854-1955-4EE3-B67F-D04680372464 | FmpLsv | BS+NV |
| 4BC18854-1955-4EE3-B67F-D04680372464 | LastAttemptStatus | BS+NV |
| 4BC18854-1955-4EE3-B67F-D04680372464 | LastAttemptVersion | BS+NV |
| 4C19049F-4137-4DD3-9C10-8B97A83FFDFA | MemoryTypeInformation | BS+NV |
| 5F95741E-CD01-441C-8FAB-AD05FB793919 | MsBootPolicySettings | BS+NV |
| 62F417C1-DB72-4967-AF48-658DB3EF885B | UVV32 | BS+NV |
| 6FF233A3-0D94-4576-A302-92CAF7B1030E | TouchSystemLock | BS+NV |
| 711C703F-C285-4B10-A3B0-36ECBD3C8BE2 | CapsuleLongModeBuffer | BS+NV |
| 77FA9ABD-0359-4D32-BD60-28F4E78F784B | BootDebugPolicyApplied | BS+NV |
| 77FA9ABD-0359-4D32-BD60-28F4E78F784B | BootingDeviceTypeInfo | BS+NV |
| 77FA9ABD-0359-4D32-BD60-28F4E78F784B | CurrentActivePolicy | BS+NV |
| 77FA9ABD-0359-4D32-BD60-28F4E78F784B | CurrentPolicy | AW+HW+BS+NV |
| 77FA9ABD-0359-4D32-BD60-28F4E78F784B | WindowsBootChainSvn | BS+NV |
| 7847C8A3-DF85-4EAC-8E84-6E151686E051 | EnableSimultaneousMultithreading | BS+NV |
| 7F98EFE9-50AA-4598-B7C1-CB72E1CC5224 | FPConfigNVData | BS+NV |
| 7F98EFE9-50AA-4598-B7C1-CB72E1CC5224 | FrontPageTabDisplayVariable | BS+NV |
| 7F98EFE9-50AA-4598-B7C1-CB72E1CC5224 | RebootReason | BS+NV |
| 8732B833-5367-422C-A77D-99E5B51039A8 | HSTI_RESULTS | BS+NV |
| 8BE4DF61-93CA-11D2-AA0D-00E098032B8C | Boot0000 | RT+BS+NV |
| 8BE4DF61-93CA-11D2-AA0D-00E098032B8C | Boot0001 | RT+BS+NV |
| 8BE4DF61-93CA-11D2-AA0D-00E098032B8C | Boot0002 | RT+BS+NV |
| 8BE4DF61-93CA-11D2-AA0D-00E098032B8C | Boot0005 | RT+BS+NV |
| 8BE4DF61-93CA-11D2-AA0D-00E098032B8C | Boot0007 | RT+BS+NV |
| 8BE4DF61-93CA-11D2-AA0D-00E098032B8C | BootOrder | RT+BS+NV |
| 8BE4DF61-93CA-11D2-AA0D-00E098032B8C | ConIn | RT+BS+NV |
| 8BE4DF61-93CA-11D2-AA0D-00E098032B8C | ConOut | RT+BS+NV |
| 8BE4DF61-93CA-11D2-AA0D-00E098032B8C | HwErrRecSupport | RT+BS+NV |
| 8BE4DF61-93CA-11D2-AA0D-00E098032B8C | Lang | RT+BS+NV |
| 8BE4DF61-93CA-11D2-AA0D-00E098032B8C | OsIndications | RT+BS+NV |
| 8BE4DF61-93CA-11D2-AA0D-00E098032B8C | PlatformLang | RT+BS+NV |
| 8BE4DF61-93CA-11D2-AA0D-00E098032B8C | Timeout | RT+BS+NV |
| 8BE4DF61-93CA-11D2-AA0D-00E098032B8C | BootCurrent | RT+BS |
| 8BE4DF61-93CA-11D2-AA0D-00E098032B8C | ConInDev | RT+BS |
| 8BE4DF61-93CA-11D2-AA0D-00E098032B8C | ErrOutDev | RT+BS |
| 8BE4DF61-93CA-11D2-AA0D-00E098032B8C | ConOutDev | RT+BS |
| 8BE4DF61-93CA-11D2-AA0D-00E098032B8C | PlatformLangCodes | RT+BS |
| 8BE4DF61-93CA-11D2-AA0D-00E098032B8C | LangCodes | RT+BS |
| 8BE4DF61-93CA-11D2-AA0D-00E098032B8C | BootOptionSupport | RT+BS |
| 8BE4DF61-93CA-11D2-AA0D-00E098032B8C | OsIndicationsSupported | RT+BS |
| 8BE4DF61-93CA-11D2-AA0D-00E098032B8C | VendorKeys | RT+BS |
| 8BE4DF61-93CA-11D2-AA0D-00E098032B8C | SecureBoot | RT+BS |
| 8BE4DF61-93CA-11D2-AA0D-00E098032B8C | SignatureSupport | RT+BS |
| 8BE4DF61-93CA-11D2-AA0D-00E098032B8C | SetupMode | RT+BS |
| 9073E4E0-60EC-4B6E-9903-4C223C260F3C | VendorKeysNv | AW+RT+BS+NV |
| 95303868-CE53-4CDD-86E5-F030F7D0CEF0 | CloudRecoveryImageId | RT+BS+NV |
| 95303868-CE53-4CDD-86E5-F030F7D0CEF0 | CloudRecoveryImageServerURL | RT+BS+NV |
| 9B69B1B2-4ECD-4249-9E49-4D0DDF62949F | FmpLsv | BS+NV |
| 9B69B1B2-4ECD-4249-9E49-4D0DDF62949F | LastAttemptStatus | BS+NV |
| 9B69B1B2-4ECD-4249-9E49-4D0DDF62949F | LastAttemptVersion | BS+NV |
| A5DABCF0-C7A1-4370-8C21-FA50D322A43E | ConInAct | RT+BS+NV |
| A5F91090-3EFC-4BC2-BE0A-28C56DD0BA73 | FmpLsv | BS+NV |
| A5F91090-3EFC-4BC2-BE0A-28C56DD0BA73 | LastAttemptVersion | BS+NV |
| A5F91090-3EFC-4BC2-BE0A-28C56DD0BA73 | UpdateState | BS+NV |
| A9546312-509B-4EB7-9E15-32002DE0E94C | PreviousUefiBootSourceDebugModeVariableName | BS+NV |
| A9546312-509B-4EB7-9E15-32002DE0E94C | SourceDebugSignatureSaltVariableName | RT+BS+NV |
| AAF32C78-947B-439A-A180-2E144EC37792 | AuthVarKeyDatabase | AW+NV |
| AEB9C5C1-94F1-4D02-BFD9-4602DB2D3C54 | Tcg2PhysicalPresence | RT+BS+NV |
| AEB9C5C1-94F1-4D02-BFD9-4602DB2D3C54 | Tcg2PhysicalPresenceFlags | RT+BS+NV |
| B0FF22E2-4AEA-4725-A6E5-5317FB8FD39C | FmpLsv | BS+NV |
| B0FF22E2-4AEA-4725-A6E5-5317FB8FD39C | LastAttemptStatus | BS+NV |
| B0FF22E2-4AEA-4725-A6E5-5317FB8FD39C | LastAttemptVersion | BS+NV |
| B414CAF8-8225-4D6F-B918-CDE5CB84CF0B | SaPegData | BS+NV |
| BA57E015-65B3-4C3C-B274-659192F699E3 | BugCheckCode | RT+BS+NV |
| BA57E015-65B3-4C3C-B274-659192F699E3 | BugCheckParameter1 | RT+BS+NV |
| BA57E015-65B3-4C3C-B274-659192F699E3 | BugCheckProgress | RT+BS+NV |
| BB983CCF-151D-40E1-A07B-4A17BE168292 | MemoryOverwriteRequestControlLock | RT+BS+NV |
| C076EC0C-7028-4399-A072-71EE5C448B9F | CustomMode | BS+NV |
| C095791A-3001-47B2-80C9-EAC7319F2FA4 | FirmwarePerformance | BS+NV |
| C6BBD941-BFE0-44B8-BEDC-04D3A7E90AD9 | _IPCVN | BS+NV |
| C6BBD941-BFE0-44B8-BEDC-04D3A7E90AD9 | _SPP | BS+NV |
| C7F83EAA-BDE5-49AA-AF79-853FC054E9AB | GetSetTempKey | RT+BS+NV |
| C7F83EAA-BDE5-49AA-AF79-853FC054E9AB | SetOEMStrings | RT+BS+NV |
| C7F83EAA-BDE5-49AA-AF79-853FC054E9AB | DSN3 | BS |
| C7F83EAA-BDE5-49AA-AF79-853FC054E9AB | DSN2 | BS |
| C7F83EAA-BDE5-49AA-AF79-853FC054E9AB | DSN1 | BS |
| C7F83EAA-BDE5-49AA-AF79-853FC054E9AB | UUID | BS |
| C94F8C4D-9B9A-45FE-8A55-238B67302643 | MemoryConfig | BS+NV |
| CE299659-9833-4B18-9A78-A1E028EFFF03 | FmpLsv | BS+NV |
| CE299659-9833-4B18-9A78-A1E028EFFF03 | LastAttemptStatus | BS+NV |
| CE299659-9833-4B18-9A78-A1E028EFFF03 | LastAttemptVersion | BS+NV |
| D2E0B9C9-9860-42CF-B360-F906D5E0077A | _SurfaceSmbiosType00Vendor | BS+NV |
| D2E0B9C9-9860-42CF-B360-F906D5E0077A | _SurfaceSmbiosType01Family | BS+NV |
| D2E0B9C9-9860-42CF-B360-F906D5E0077A | _SurfaceSmbiosType01Manufacturer | BS+NV |
| D2E0B9C9-9860-42CF-B360-F906D5E0077A | _SurfaceSmbiosType01ProductName | BS+NV |
| D2E0B9C9-9860-42CF-B360-F906D5E0077A | _SurfaceSmbiosType01SerialNumber | BS+NV |
| D2E0B9C9-9860-42CF-B360-F906D5E0077A | _SurfaceSmbiosType01SkuNumber | BS+NV |
| D2E0B9C9-9860-42CF-B360-F906D5E0077A | _SurfaceSmbiosType01UUID | BS+NV |
| D2E0B9C9-9860-42CF-B360-F906D5E0077A | _SurfaceSmbiosType01Version | BS+NV |
| D2E0B9C9-9860-42CF-B360-F906D5E0077A | _SurfaceSmbiosType02Manufacturer | BS+NV |
| D2E0B9C9-9860-42CF-B360-F906D5E0077A | _SurfaceSmbiosType02ProductName | BS+NV |
| D2E0B9C9-9860-42CF-B360-F906D5E0077A | _SurfaceSmbiosType02SerialNumber | BS+NV |
| D2E0B9C9-9860-42CF-B360-F906D5E0077A | _SurfaceSmbiosType03AssetTagNumber | RT+BS+NV |
| D2E0B9C9-9860-42CF-B360-F906D5E0077A | _SurfaceSmbiosType03Manufacturer | BS+NV |
| D2E0B9C9-9860-42CF-B360-F906D5E0077A | _SurfaceSmbiosType03SerialNumber | BS+NV |
| D2E0B9C9-9860-42CF-B360-F906D5E0077A | AWord | BS+NV |
| D2E0B9C9-9860-42CF-B360-F906D5E0077A | FactorySpecializationTime | RT+BS+NV |
| D2E0B9C9-9860-42CF-B360-F906D5E0077A | OA3Key | BS+NV |
| D2E0B9C9-9860-42CF-B360-F906D5E0077A | Type3.AssetTag | RT+BS+NV |
| D2E0B9C9-9860-42CF-B360-F906D5E0077A | VUPE | BS+NV |
| D41C8C24-3F5E-4EF4-8FDD-073E1866CD01 | UEFISettingsCurrent | RT+BS+NV |
| D9BEE56E-75DC-49D9-B4D7-B534210F637A | certdb | AW+HW+BS+NV |
| D9BEE56E-75DC-49D9-B4D7-B534210F637A | certdbv | AW+HW+BS |
| D9EC1EA7-8101-48E7-8752-2E152DD6B922 | ReadyToBootSignalled | RT+BS |
| D9EC1EA7-8101-48E7-8752-2E152DD6B922 | EndOfDxeSignalled | RT+BS |
| DB7A4DBD-0242-4375-A821-78F587372C18 | isTouchCalibrated | RT+BS+NV |
| DE6A8726-05DF-43CE-B600-92BD5D286CFD | SignerProvisionCurrent | RT+BS+NV |
| E20939BE-32D4-41BE-A150-897F85D49829 | MemoryOverwriteRequestControl | RT+BS+NV |
| E3CACF62-3062-4E1D-978E-46807AB9747D | PlatformConfigurationChange | BS+NV |
| EAEC226F-C9A3-477A-A826-DDC716CDC0E3 | OfflineUniqueIDEKPub | RT+BS+NV |
| EAEC226F-C9A3-477A-A826-DDC716CDC0E3 | OfflineUniqueIDEKPubCRC | RT+BS+NV |
| EAEC226F-C9A3-477A-A826-DDC716CDC0E3 | UnlockID | BS+NV |
| EAEC226F-C9A3-477A-A826-DDC716CDC0E3 | UnlockIDCopy | RT+BS+NV |
| EB704011-1402-11D3-8E77-00A0C969723B | MTC | RT+BS+NV |
| F24643C2-C622-494E-8A0D-4632579C2D5B | TrEEPhysicalPresence | RT+BS+NV |
| F24643C2-C622-494E-8A0D-4632579C2D5B | TrEEPhysicalPresenceFlags | RT+BS+NV |
| F3DD175C-A56E-AF49-7E50-50494654577E | EUWifiFlag | RT+BS+NV |
| F3DD175C-A56E-AF49-7E50-50494654577E | WIFI11bOffset | RT+BS+NV |
| F3DD175C-A56E-AF49-7E50-50494654577E | Wifi80MHzPowerBackoff | RT+BS+NV |
| F3DD175C-A56E-AF49-7E50-50494654577E | WifiMACAddress | RT+BS+NV |
| F3DD175C-A56E-AF49-7E50-50494654577E | WifiRegionCode | RT+BS+NV |
| F3DD175C-A56E-AF49-7E50-50494654577E | WifiRegionTable | RT+BS+NV |
| FAB7E9E1-39DD-4F2B-8408-E20E906CB6DE | HDDP | BS+NV |
So what are some of those UEFI vendor codes? For some of them, we may never know (anyone can pick any value). But there are some that we can figure out:
- 8BE4DF61-93CA-11D2-AA0D-00E098032B8C : This is the EfiGlobalVariable vendor GUID that was talked about previously.
- 77FA9ABD-0359-4D32-BD60-28F4E78F784B : These are Microsoft Windows-related values. You can find some references to them on the internet.
- D2E0B9C9-9860-42CF-B360-F906D5E0077A : These look like Surface-specific variables.
Sadly, one of the values that I would like to be able to see from the running OS, the UEFI version, isn’t accessible from the OS (RT attribute not set). And since I had to turn off Secure Boot to run the EFI shell, that could have altered other variables (beyond the obvious ones in the Secure Boot documentation), so this might miss some.
OK, so we can see the values from the UEFI shell on a physical device – goal achieved. So what’s next?
Chapter 5: Back in the OS
In theory, any of the runtime-accessible variables (RT in the above table) can be queried from a running OS, e.g. Windows. And there’s an API available to do that called GetFirmwareEnvironmentVariable (with various flavors). I’ve actually used that years ago in MDT, because it’s the way to determine if the device booted using UEFI or not: If you make the API call looking for a random/invalid ID, the error code returned will be enough of a clue. If it fails with a “not found” error, you know it was booted using UEFI; if it fails with a “not supported” error, you know it’s using legacy BIOS (or a UEFI CSM, which is effectively an emulated legacy BIOS).
But now we want to use it for “real stuff.” The biggest challenge with the API is that you have to know what you are looking for; there is no API to let you enumerate through all the available variables. So the list above provides a good starting point for that problem.
Interestingly, there is a PowerShell script that already retrieves some of the UEFI variables, called Get-SecureBootUEFI. It works well:

But it doesn’t let you retrieve arbitrary variables, so back to the drawing board. With a little C# code embedded in a PowerShell script (attached to this blog), you can query whatever you want (at least those variables that are tagged “RT” in the table above). An example:

This does require running with admin rights (elevated).
Whew. For me, this was a learning exercise, building up knowledge for future use. For anyone who actually read this entire article, hopefully you learned something too.
Attachment: Get-UEFIVariable.zip
Share this:

Categories: Geeking Out

Hey Michael, very informative as always. Just curious for as someone looking to start their own blog with in depth posts, how long would you say it took to complete this post (discovery and writing)? A day, a week, a month?
LikeLike
This one took a long time for me, about 1.5 days. My typical goal for a post is no more than 1-2 hours.
LikeLike